Example: Create Planning Template and Asset Task with Manual Repeat
In the following example, we create a ultrasonic testing inspection planning template for a subset of CML assets with manual repeat.
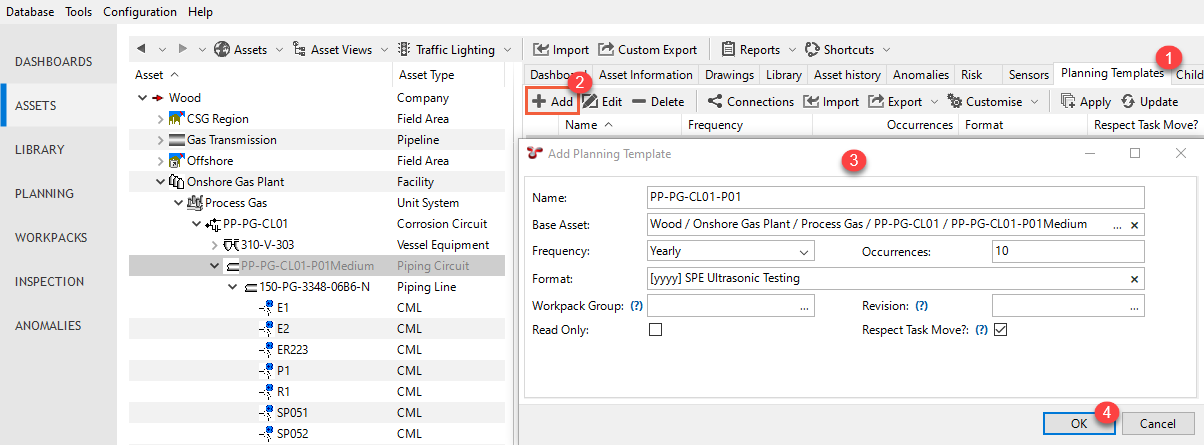
Create a planning template.
On the ASSETS or PLANNING screen, go to the Planning Templates tab
and choose Add
.
In the Add Planning Template dialog, enter data as follows:
Name: Choose a name that best describes your planning template.
Base Asset: Select a parent asset, which will behave as a filter in later screens.
Frequency: Select Yearly, which means that a task will be created on a yearly basis.
Occurrences: Enter 10, which means that we will be able to view 10 columns on the Summary tab (see next step).
Format: Enter [yyyy] SPE Ultrasonic Testing, which means that when the workpacks are automatically generated, they will be named 2024 SPE Ultrasonic Testing, 2025 SPE Ultrasonic Testing, 2026 SPE Ultrasonic Testing and so on.
For more information about the parameters in this dialog, see Add/Edit Planning Template Dialog.
Click OK to save the planning template.
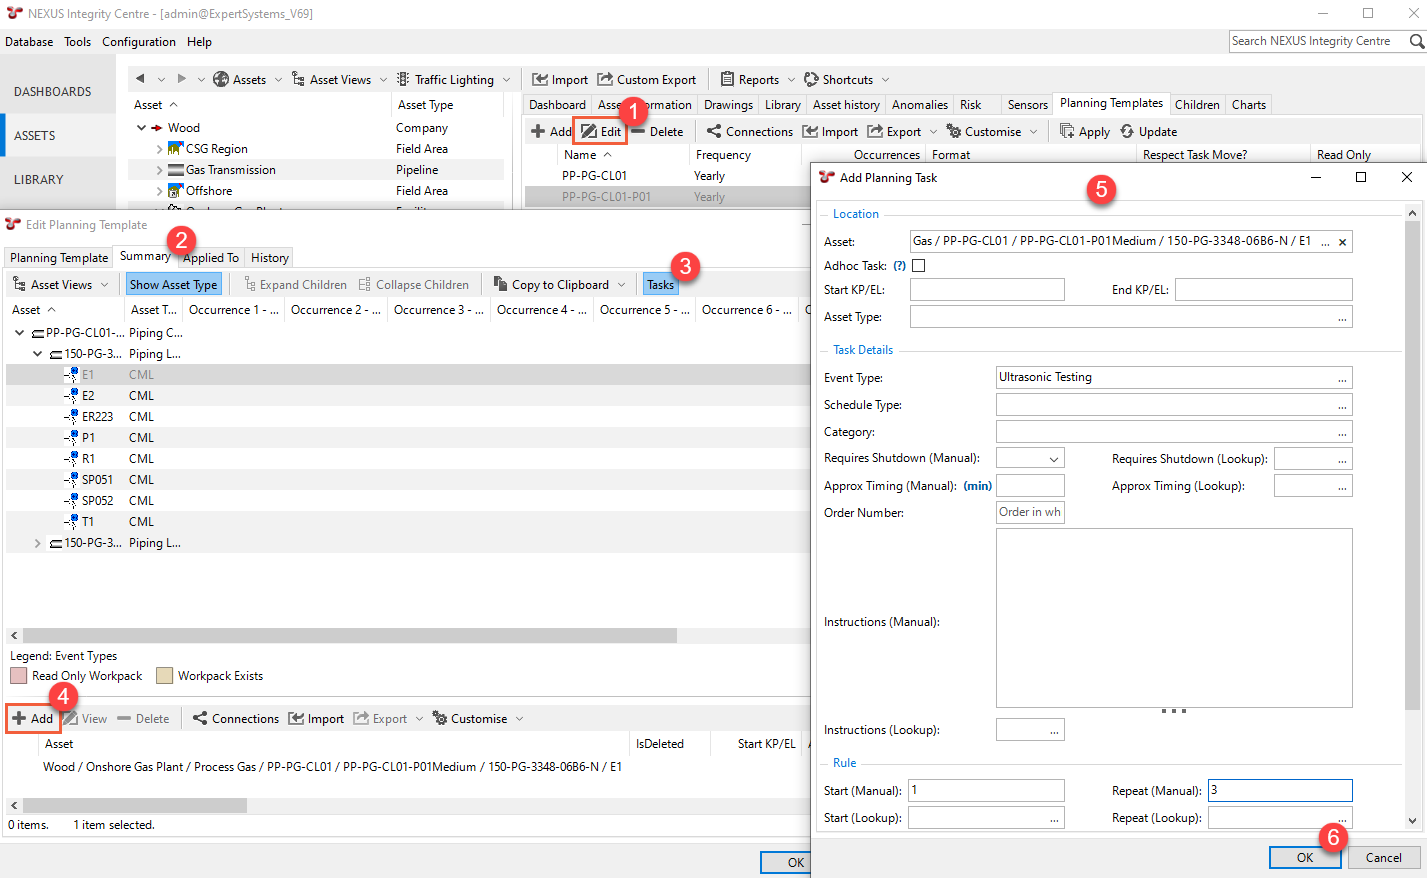
Create the planning template tasks.
Select the planning template you created in the previous step on the Planning Templates tab and choose Edit from the toolbar
In the Edit Planning Template dialog, go to the Summary tab
.
In the bottom part of the dialog, choose Add from the toolbar
.
In the Add Planning Task dialog, specify the following:
Asset - Select the asset for which you want to create the task.
Event Type - Select the Ultrasonic Testing event type.
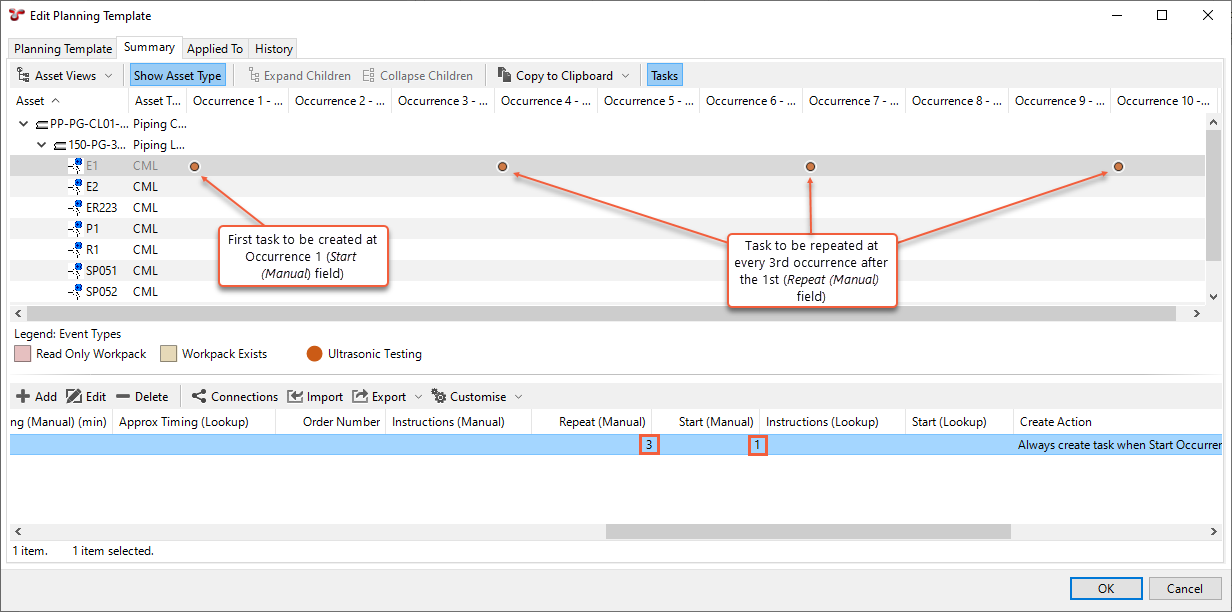
Start - Enter 1 as the first occurrence that this task should occur.
Repeat - Enter 3 to indicate that you want this task to be created at every third occurrence. In this case, since the planning template’s frequency is yearly, a task will be created every third year after the first occurrence.
For more information about specifying the parameters, see Add/Edit Planning Task Dialog.
Click OK to save the planning task
.
Result
On the Summary tab, you can see where the tasks will be created once the planning template is applied. Note that there are altogether 10 occurrences shown on the screen, as we have defined 10 occurrences for the planning template.
Apply the planning template.
Applying the planning template creates the workpack and task records.
On the ASSETS or PLANNING screen, go to the Planning Templates tab and select the planning template.
Click Apply in the toolbar to launch the Apply Planning Template wizard.
Set up the Occurrences to define how far into the future you want to create workpacks. In this example, we want to create 10 years of future workpacks, thus, we enter 10 in the Number of Occurrences field. All future dates will be will automatically calculated.
Click Next.
In the next dialog, we can specify the workpacks for each occurrence, either by choosing an existing workpack or electing to create a new workpack for the tasks to be created in. In this example, we want to create new workpacks, one in each occurrence (year) for 10 occurrences (years), thus, we leave the value <New> in the Workpack column for each occurrence.

Click Apply.
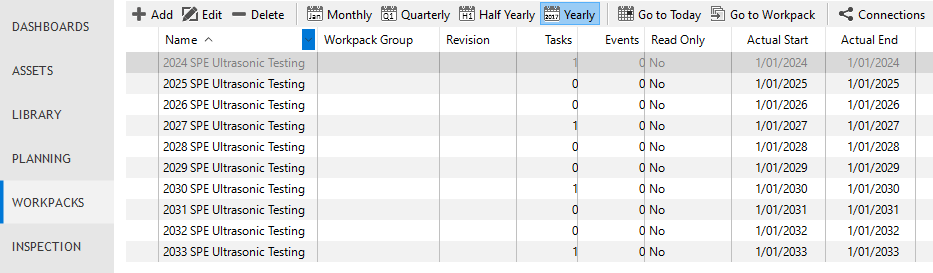
Check the workpacks.
Select the newly created workpacks on the WORKPACKS screen and view the tasks in that workpacks. In this example, tasks have been created in the 2024 SPE Ultrasonic Testing, 2027 SPE Ultrasonic Testing, 2030 SPE Ultrasonic Testing and 2033 SPE Ultrasonic Testing workpacks (the 1st occurrence, then every 3rd occurrence after that).