Insert Table of Contents, Configure Selection Parameters, Verify Output
In this step, you insert a Table of Contents element and check if the output complies with your requirements.
See the detailed steps below:
Prerequisites
You have completed the following steps:
Process
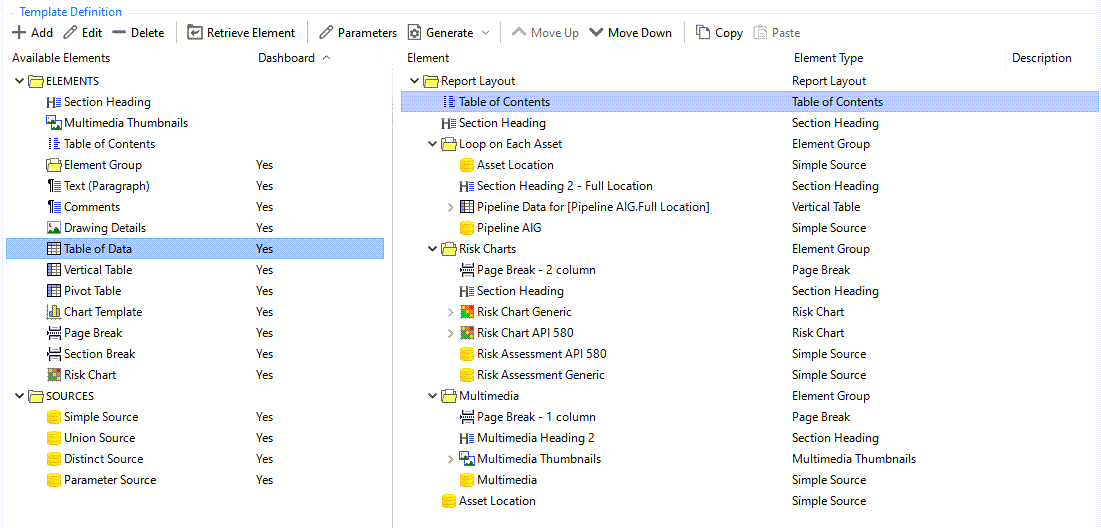
1. Insert a Table of Contents element.
Drag the Table of Contents element or select it and choose Add to insert it in the Report Layout structure. Ensure that it is the first node within the structure:
Note
The Table of Contents element is applicable only to RTF and HTML outputs.
The formatting of the Table of Contents element depends on your settings for the elements starting with TOC in your generic report style configurations (see Styles). You can adjust the look of each heading level as required. For example, for Heading 2 in the TOC, you edit the style TOC Heading 2 and add a left padding value “30”.
In the RTF output, you must right-click and update the table of contents to ensure that page numbers appear correctly.
2. Configure Selection Parameters for Report Generation.
While creating this report template, we created two user parameters. When generating the report, users are prompted to make selections for these parameters before the output is created:
We created filters with user parameter for the Asset Location VN_ID field when configuring some of the Simple Sources (for example, in step 2. Add an asset tree filter to the Asset Location simple source.).
We inserted a Multimedia Thumbnail element, which automatically adds the Merge Last Row to Centre Images for Multiple Columns checkbox to the selection parameters (see 5. Insert a Multimedia Thumbnail element.).
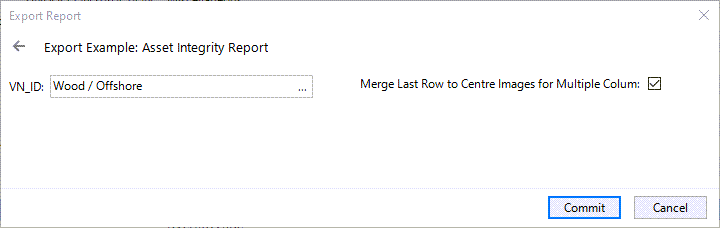
When generating the report from the Configuration - Templates dialog, the following selection dialog is displayed before the output is created:
The field label VN_ID is not user-friendly, so we want to change this text, also, we want the fields to take the full 2-column width of the dialog and appear below each other. To do that, proceed as follows:
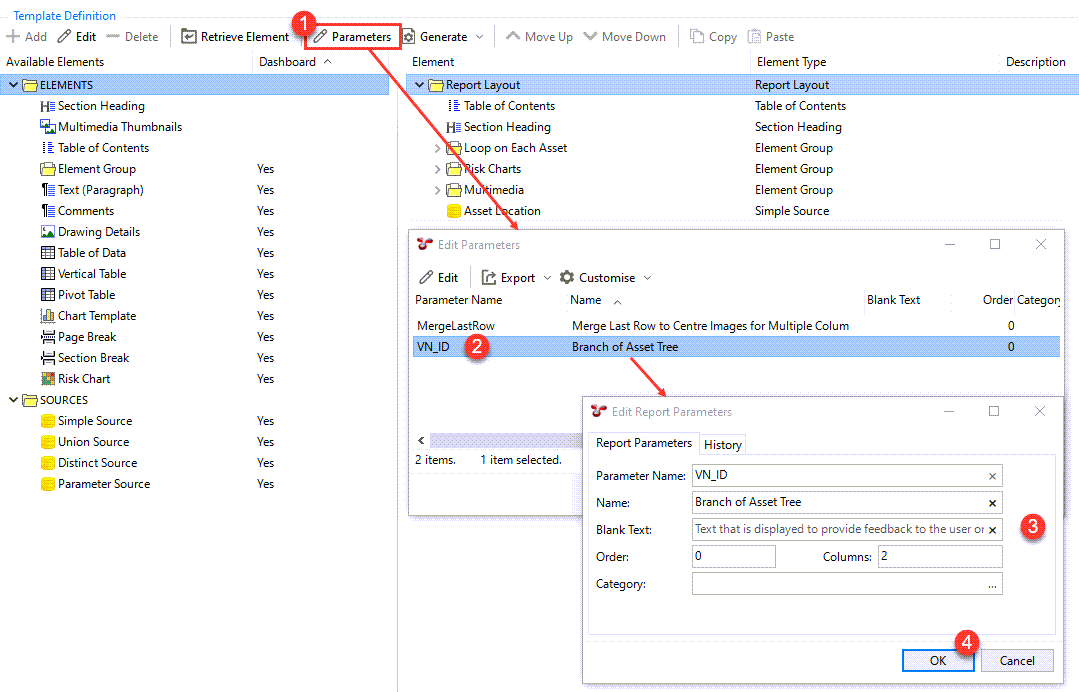
In the Edit Report Template dialog for our report template, choose Parameters.
In the Edit Parameters dialog, double-click the VN_ID row or select it and choose Edit.
In the Edit Report Parameters dialog, make settings as follows:
Parameter Name: This is an internal text to identify the parameter, so you can leave it as is.
Name: Enter the text that you want to display as a field label, for example, Branch of Asset Tree.
Order: You want this parameter to appear first, so you either leave it 0 and set 1 for the next parameter, or you enter 1 and set 2 for the next one.
Columns: The current setting is 1, which means that the width of the field is 1-column within the 2-column dialog. You want the field to take the full width, so you change this value to 2.
Click OK.
Back in the Edit Parameters dialog, double-click the MergeLastRow row or select it and choose Edit.
In the Edit Report Parameters dialog, you can leave the current texts as they are, just change the values of the following fields:
Order: You want this parameter to appear second, so you enter a larger number than the number you used for the previous parameter.
Columns: The current setting is 1, which means that the width of the field is 1-column within the 2-column dialog. You want the field to take the full width, so you change this value to 2.
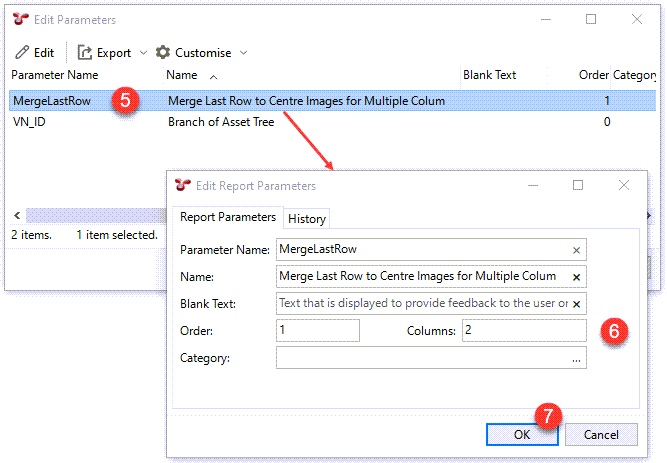
Click OK.
Result
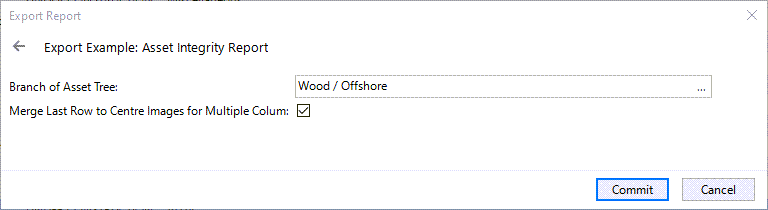
When you generate the output, the updated selection parameters appear as follows:


3. Generate an output to check the final output of the report.
To generate the output, proceed as follows:
In the Edit Report Template dialog, choose OK to close the dialog and save your changes.
Back in the Configuration - Templates dialog, select the report template and choose the Generate toolbar button.
Select the required output format from the drop-down, which can be either RTF, HTML, Microsoft Excel or PDF.
Select a report destination, which, in this case, will be File.
Choose Commit.
Close the Configuration - Templates dialog.
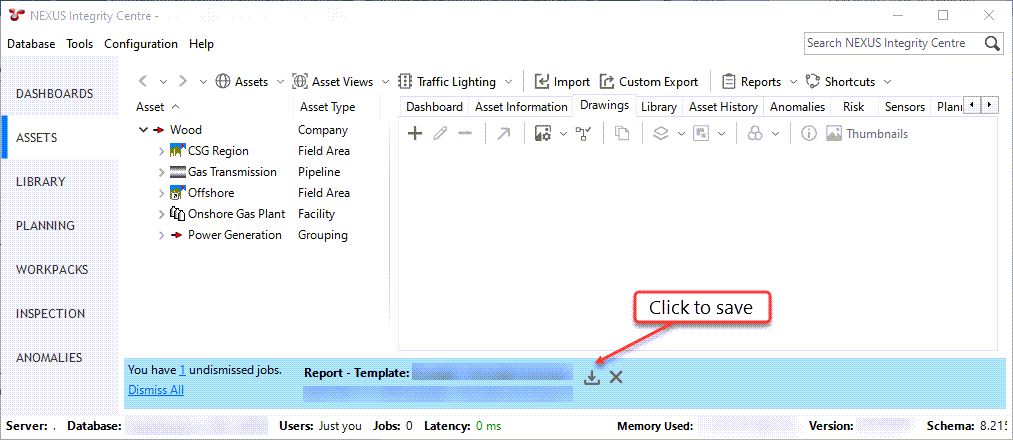
Wait until the report output is generated. The progress is indicated at the bottom of the main NEXUS IC screen.
Once the generation is complete, click the Save
icon to download and save the report.
Select the destination and open the file.
If you generated an RTF output, right-click the Table of Contents and choose Update Field to ensure that page numbers appear correctly.
Review the report to verify it meets your expectations.