Set up a Shortcut to Publish to Documentum
The Documentum tool can be used to upload library items and documents to Documentum. Documentum is a secure hosting service that can be used for document management, collaboration, search and classification of documents. This example shows how you can use the tool in NEXUS by configuring a shortcut to prepare the document and relevant metadata for upload. Once the shortcut has been created, a new toolbar button will be available on the LIBRARY screen that allows you to publish the selected library item to Documentum.
Note
You must completely close and reopen NEXUS when you make any change to a shortcut. Shortcuts do not refresh.
We recommend that you regularly save the shortcut (click OK) and reopen the editing window as you progress through the setup process. This saves any progress you have made and ensures that changes are not lost.
Prerequisites
Before you set up the shortcut, you must have the following functions available:
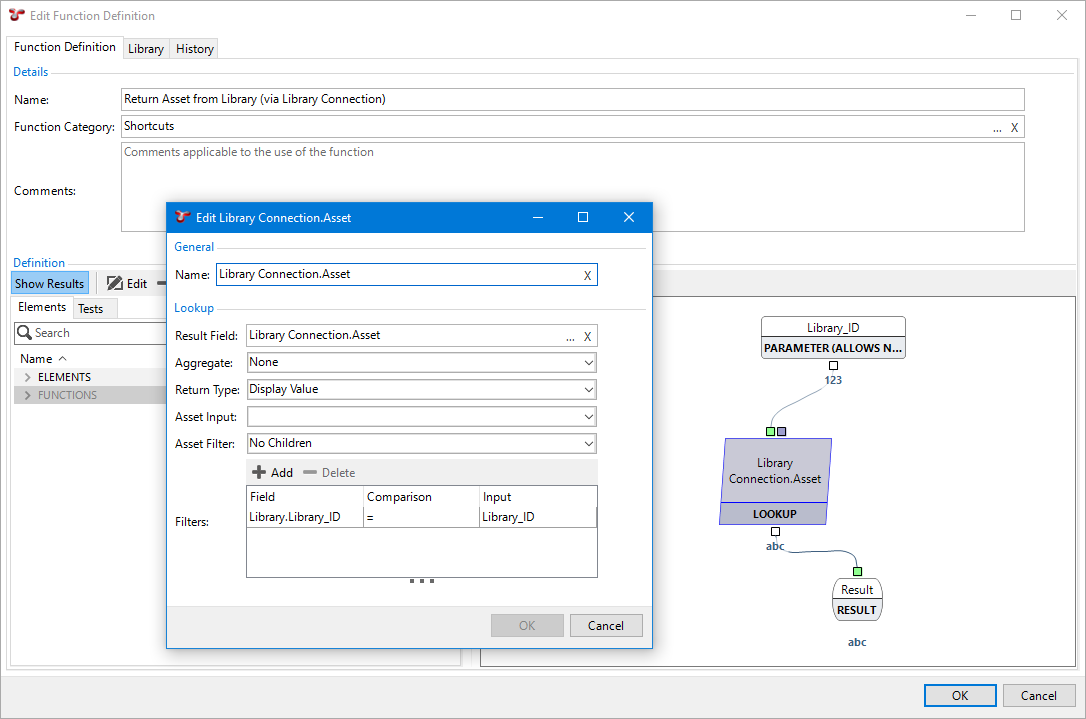
A function that returns the Asset ID of the asset to which a specific library item belongs:
A function that returns the current date.
Process
From the menu, choose and click Add in the Configuration - Shortcuts dialog.
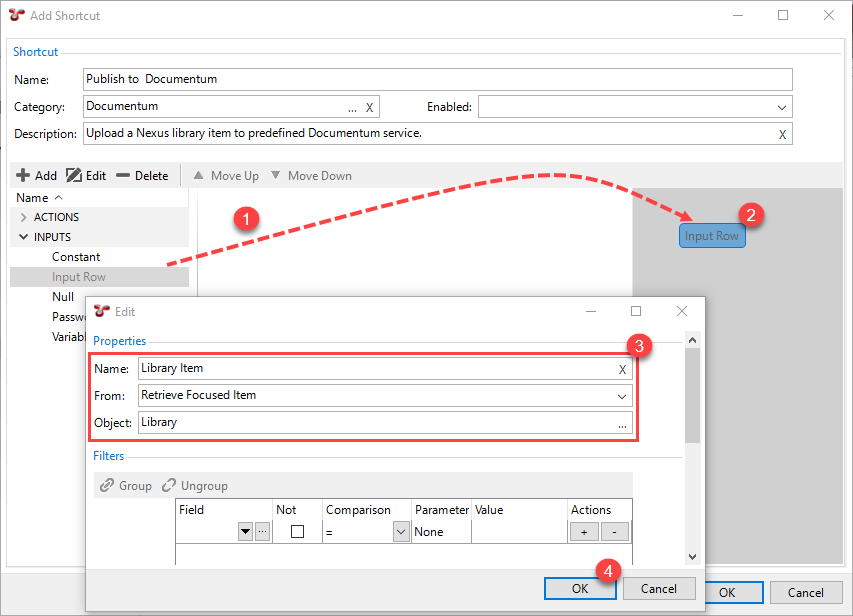
Enter the name (mandatory) and category (optional) of the shortcut as required. You can also specify a description. In this example:
Name: Publish to Documentum
Category: Documentum
Description: Upload a Nexus library item to predefined Documentum service.
Set up the shortcut trigger, which will be the library item that you want to be uploaded to Documentum. For this, you need to add an Input Row input element.
Under INPUTS, choose the Input Row element and drag it to the grey shortcut editor screen area
 .
.Double-click the new Input Row element
 .
.Define the element’s properties as follows
 :
:Name: Specify a unique name for the triggering element, for example, Library Item.
From: Choose Retrieve Focused Item from the drop-down list.
Object: Click the
 and select the Library system table.
Optionally, you can add Filters for the client-specific Documentum workflow.
Click OK
 .
.
Similarly to the step above, add Constant input elements with the following properties:
Name
Type
Value
Field Name
Alphanumeric
Asset Field
Published By
Alphanumeric
NEXUS IC
Approved
Alphanumeric
Approved
Department
Alphanumeric
Integrity
Yes
Yes / No
Yes
Folder Path
Alphanumeric
{example repository folder}
UserName
Alphanumeric
pims
Documentum REST URL
Alphanumeric
Respository
Alphanumeric
EDMS_PROD
Cabinet
Alphanumeric
Knowledge Repository
Object type
Alphanumeric
ad_tcio_document
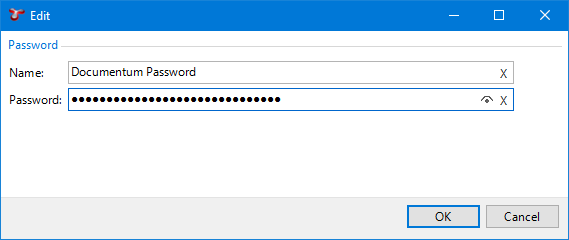
Similarly to the steps above, add a Password input element. This will store the password to your Documentum service.
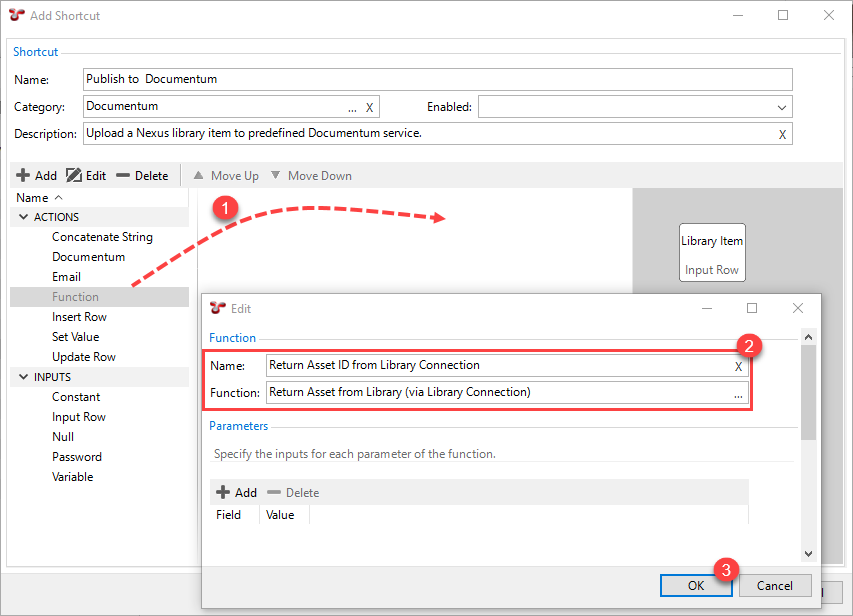
Add a Function action element to return the Asset ID. This will take in the functional value of the library item in the Input Row, that is, the document being uploaded to Documentum. Based on this functional value, this function outputs the asset ID of the asset to which the library item belongs.
Under ACTIONS, choose the Function element and drag it to the white shortcut editor screen area
.Define the element’s properties as follows
:Name: Enter a name to identify the function, for example, Return Asset ID from Library Connection.
Function: Select the predefined function that returns the asset ID (see Prerequisites).
Click OK
.
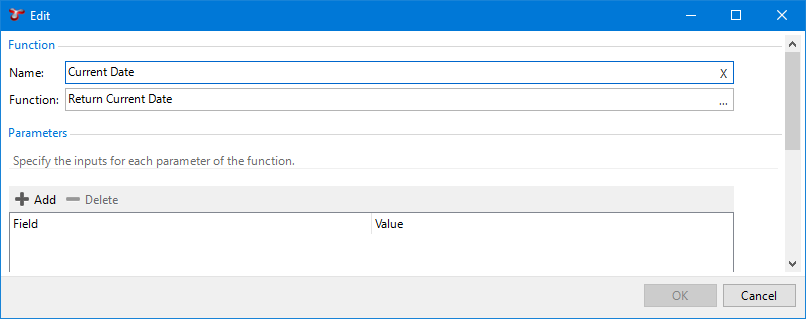
Similarly to the step above, add a Function action element with the properties below to return the current date. The date will be used as a parameter in the Documentum submission.
Name: Enter a name to identify the function, for example, Current Date.
Function: Select the predefined function that returns the current date (see Prerequisites).
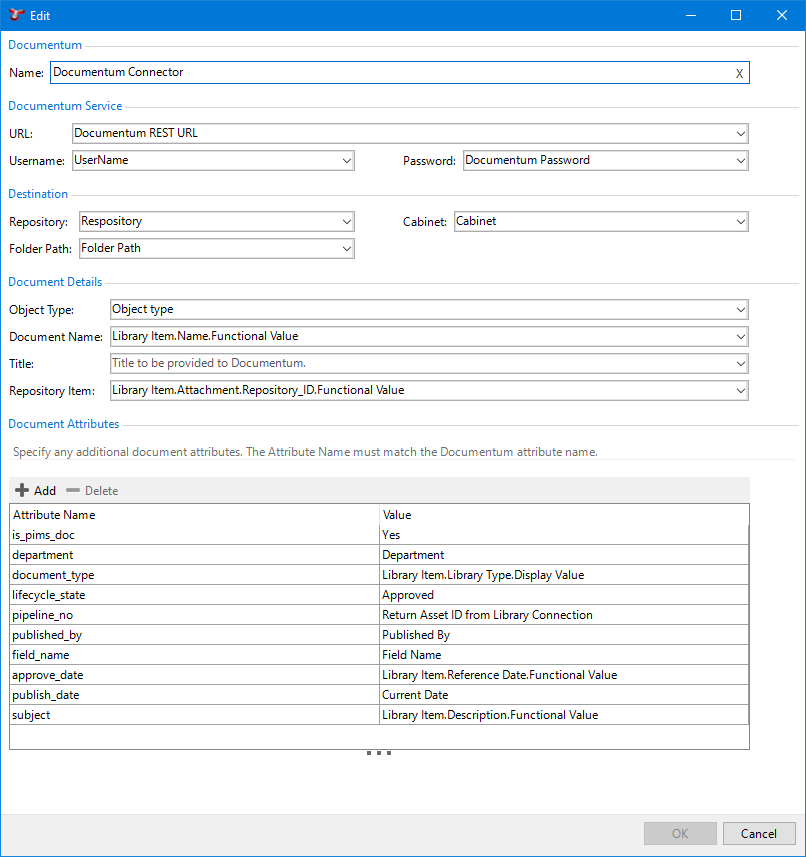
8. Add a Documentum action element. This connector uses the data supplied by the rest of the shortcut to upload to the Documentum service. Select the shortcut elements that you have created before to define its parameters:
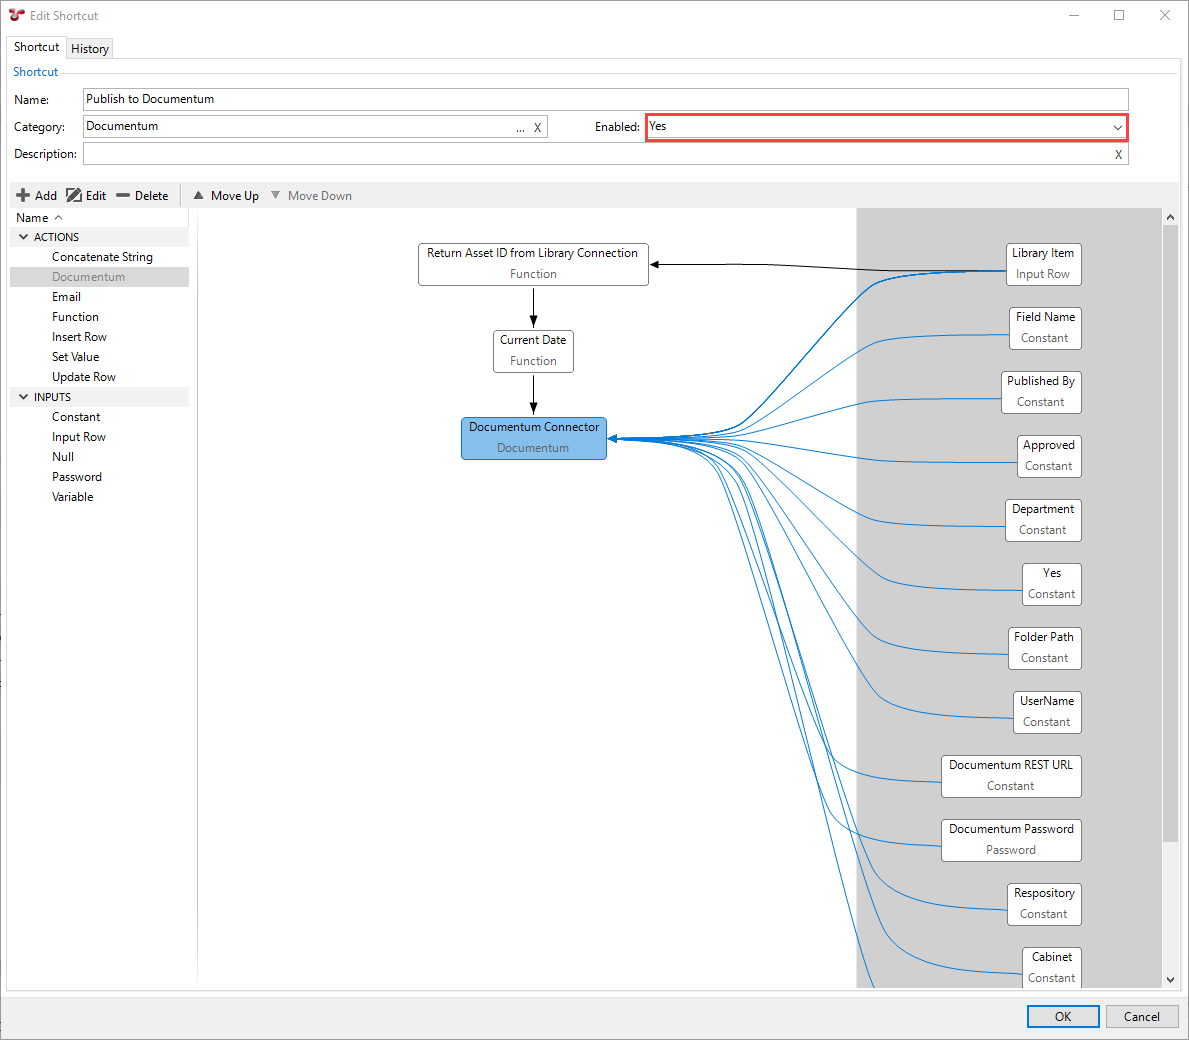
The shortcut is set up with all the parameters required. Enable the shortcut by selecting Yes in the Enabled field.
Click OK.
Close and reopen the database for your new shortcut to take effect.
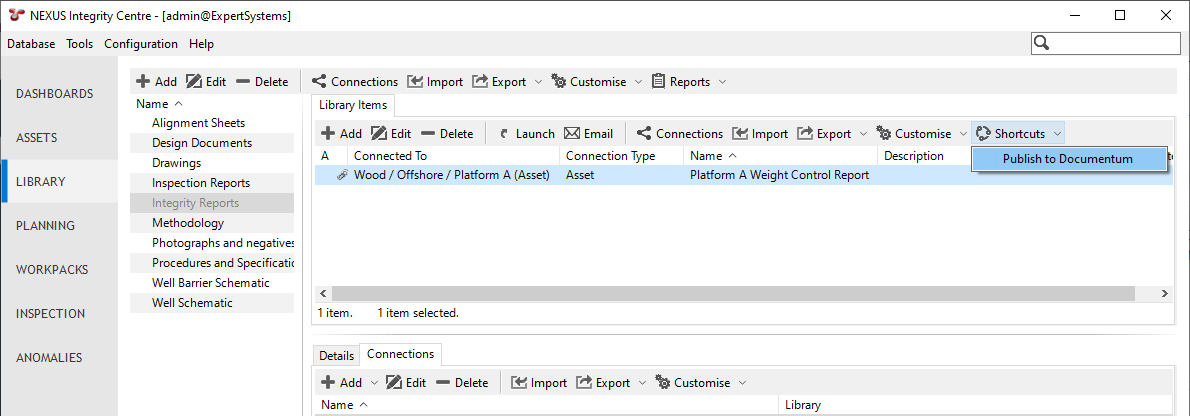
To test this functionality, go to the LIBRARY screen, select a library item and choose the new Shortcuts -> Publish to Documentum toolbar button.
See also