Configure Shortcuts
Under , you can create, edit and delete shortcuts.
Shortcuts are a series of steps grouped into a single menu item. They work similarly to Excel macros. Editing a shortcut is comparable to editing a function.
Caution
Thoroughly test shortcuts before using them in a production environment. An incorrectly configured shortcut can have a destructive effect on a NEXUS database.
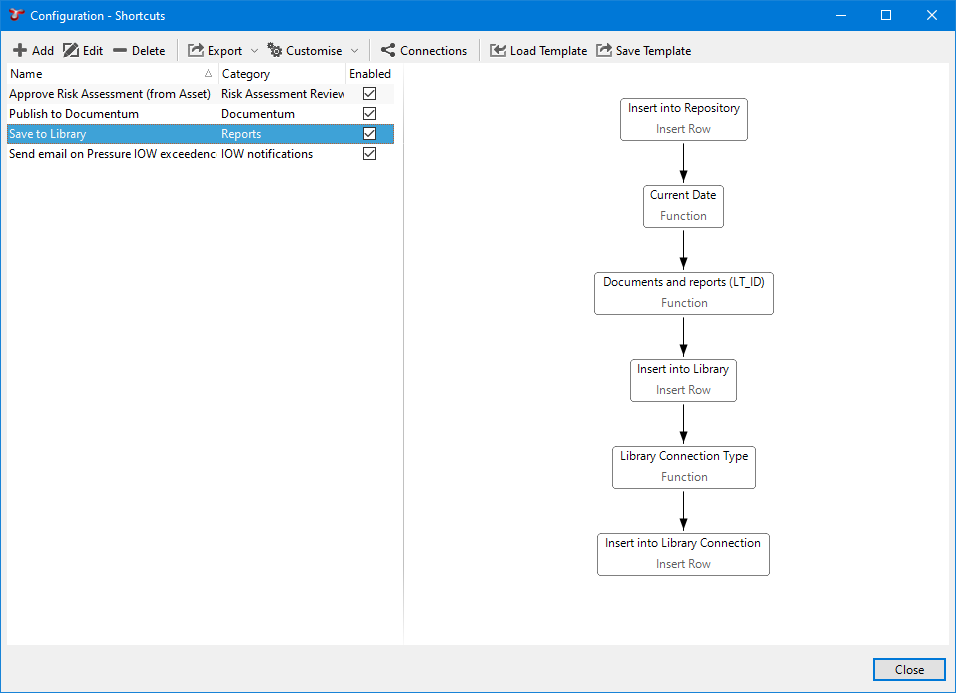
In the Configuration - Shortcuts dialog, you can see all shortcuts in the database and a visual preview of the components making up the selected shortcut. You can use the standard grid functions (see Using the Grid) in the dialog to edit, delete, import, export shortcuts or check their connections.
Create Shortcuts
To create a new shortcut:
Click Add in the Configuration - Shortcuts dialog.
In the Add Shortcut dialog, specify the main shortcut parameters at the top of the dialog:
Field/Checkbox Name
Description
Name
Enter a name that uniquely identifies the shortcut.
Category
If required, assign a category to the shortcut. For more information, see Shortcut Categories.
Enabled
Select Yes to enable the shortcut. New shortcuts are unavailable until enabled. Once enabled, the shortcut appears under the Shortcuts toolbar button. Enabling or disabling a shortcut requires closing and reopening the database for changes to take effect.
Description
Optionally, enter a brief summary (maximum 100 characters) describing what the shortcut does and how it is used.
Comments
Add comments to help users understand the shortcut. These appear under the relevant menu option in the toolbar dropdown.
Order
If multiple shortcuts appear under the same toolbar menu option, assign numbers to specify the order in which they appear. Lower numbers appear first in the list. Items without an order value are sorted alphabetically by name. If the toolbar menu uses categories, sorting is applied within each category; if there are no categories, sorting applies to the whole list.
Add shortcut elements (see Shortcut Elements) at the bottom of the dialog as follows:
Under INPUTS, select the required element and choose Add, or select the element and drag it to the grey section of the shortcut editor screen area (right-hand side).
Edit the element or double-click it to define its parameters.
Under ACTIONS, select the required element and choose Add, or select the element and drag it to the white section of the shortcut editor screen area (left-hand side).
In the dialog that opens, define the element’s parameters.
Enable the shortcut by selecting Yes in the Enabled field.
Click OK.
Close and reopen the database.
Note
After creating or editing shortcuts, close and reopen your database to refresh the available shortcut options.
Worked Examples
See the following worked examples for information about how you can set up shortcuts for specific cases:
Save/Load Shortcut Templates
In the Configuration - Shortcuts dialog, you can click Save Template to save the shortcut and related details to a .shortcut file. NEXUS IC will find all items related to this shortcut (functions, asset information forms, event definitions, chart templates, lookup tables, etc), and will display a dialog listing all the dependencies it’s found, with a checkbox for each row. Untick any that you don’t want to be saved with your shortcut.
To load a previously saved .shortcut template, click Load Template. Note that if the previously saved shortcut still exists in this database, Load Template will overwrite that existing Shortcut and it will not create a new copy of it. This works similarly for any other elements saved in the template file: asset information fields, functions, and so on.
Multi-select
You can have multi-selected rows feeding into your shortcut, so the user can select several items in a grid and then run your shortcut. But user selection dialogs launched within the shortcut are single-select. If the user multi-selects and runs a shortcut that has a selection dialog, an Apply to All checkbox appears at the bottom left of the selection dialog. If the user ticks this checkbox, their selection will apply to all remaining runs of the shortcut. If they don’t, their selection will be used for this run, and the selection dialog will be shown again for the next run.
Within an input, the From option of Retrieve Focused Item is inherently multi-select: your shortcut actually gets run once for each selected item.
Shortcut Categories
Shortcuts can be put into categories. If a shortcut’s category matches the name of an existing button menu, then the shortcut menu item will be placed in that menu.
You can set up shortcut categories under .
For example, if a shortcut is placed in a category called Assets, then on the ASSETS screen, this shortcut will be placed under the Assets toolbar button. The INSPECTION screen also has an Assets toolbar button, so the shortcut will also be placed under the Assets menu on that screen.
If the shortcut was instead placed in a category called Asset Views, then on the ASSETS screen, it would be placed under the Asset Views toolbar button. The INSPECTION screen has no such toolbar button, so instead, it would be placed under a toolbar button called Shortcuts.
Shortcuts do show when appropriate on other panes within a screen. For example, shortcuts that act on an asset will appear on the Children pane on the ASSETS screen. But shortcuts will not appear on Picker dialogs that work on that type. That is, if you edit a drawing layer and pick an asset for that layer, you won’t see shortcuts.
When shortcuts appear in a list within a context menu (accessible via right-click) or under a toolbar menu option, you can see them grouped based on the assigned shortcut categories.
Shortcut Elements
The shortcut editor contains the following two types of elements:
Actions
Actions appear in the white centre part of the shortcut editor screen area. An action can have inputs and outputs.
Inputs
Inputs appear in the grey part of the shortcut editor screen area on the right-hand side. Inputs can have an action.
These two items are very similar as some inputs may perform an action and some actions may be able to act as an input, but they are categorised and displayed in the editor based on what their primary purpose is.
Actions
Name |
Description |
|---|---|
Concatenate String |
This action builds a string using a set of inputs and the result can then be used as an input into another element. |
Documentum |
This action uploads library items and documents to Documentum. |
This action generates an email. |
|
Function |
This action executes a NEXUS function, the output of the function can be used as an input into another element. |
Insert Row |
This action is used to create a new row in a business object. |
Set Value |
This action sets the value of a variable. |
Update Row |
This action updates a row in a business object. You can use it to show a dialog to the user, by setting the action’s style to Allow User to Edit. |
Inputs
Constant |
A constant value, used as an input to an action. |
Input Row |
This forms the basis of where a shortcut exists and is triggered. |
Null |
Used to represent a NULL constant. For example, when using the Update Row action to set a field to NULL. |
Password |
Used to store an encrypted password. Currently used in the Documentum element. |
Variable |
Holds temporary information within the shortcut, used as an input to an action. |
If you select the Input Row option, the value you define in the From field determines when the shortcut is available:
On Add/On Edit/On Delete
If you choose one of these options, the shortcut runs every time a row is added to/edited/deleted in the selected object, that is, database table. In these three cases, the shortcut is only executed when the row is added/edited/deleted by our software, be it NEXUS IC, IC-Inspection or the REST service used by IC-Web, IC-Inspector and third parties.
Retrieve Focused Item
If you choose this option, the shortcut appears as a menu option on grids for the relevant object. For example, if the object is the Anomaly table, your shortcut appears as a menu item on the toolbar above the anomaly table on the ANOMALIES screen, on the ASSETS screen and on any dialog where the user is selecting an anomaly. With this option, the shortcut works only if there is at least one item in the grid.
Prompt User to Select Row
If you select this option, a picker dialog is displayed on the appropriate database table when the shortcut runs, prompting the user to select a row.
Prompt User to Select One or More Rows
Selecting this option displays a picker dialog on the appropriate database table when the shortcut runs, allowing the user to select one or multiple rows. The shortcut will then be executed for each selected row.
On New Row
This option is similar to the Retrieve Focused Item option but also works when there are no items in the grid. However, since it won’t have any data at the time of creation, it cannot prefill data based on a selected row.
The name you set for your input will be used as a title text on a user selection dialog.