Edit and Markup Images
When you tap an image on the Event Details screen (see Maintain Event Details), the image editing screen opens. From here, you can view, edit, and mark up images attached to the event.
Using the Image Editor
Swipe left or right to browse through attached images.
Rename the image by tapping its name. By default, the image name matches the task it was created from.
Toggle “Can Report” to set the Can Report status of an image. This optional flag can be used in report templates to include only key images.
Use the toolbar at the top of the screen to:
Mark up the image (see Markup)
Rotate (see Rotate)
Crop and rotate (see Crop and Rotate)
Share (see Share)
Delete (see Delete)

When you’re finished editing, tap Done to save your changes or Cancel to discard them.
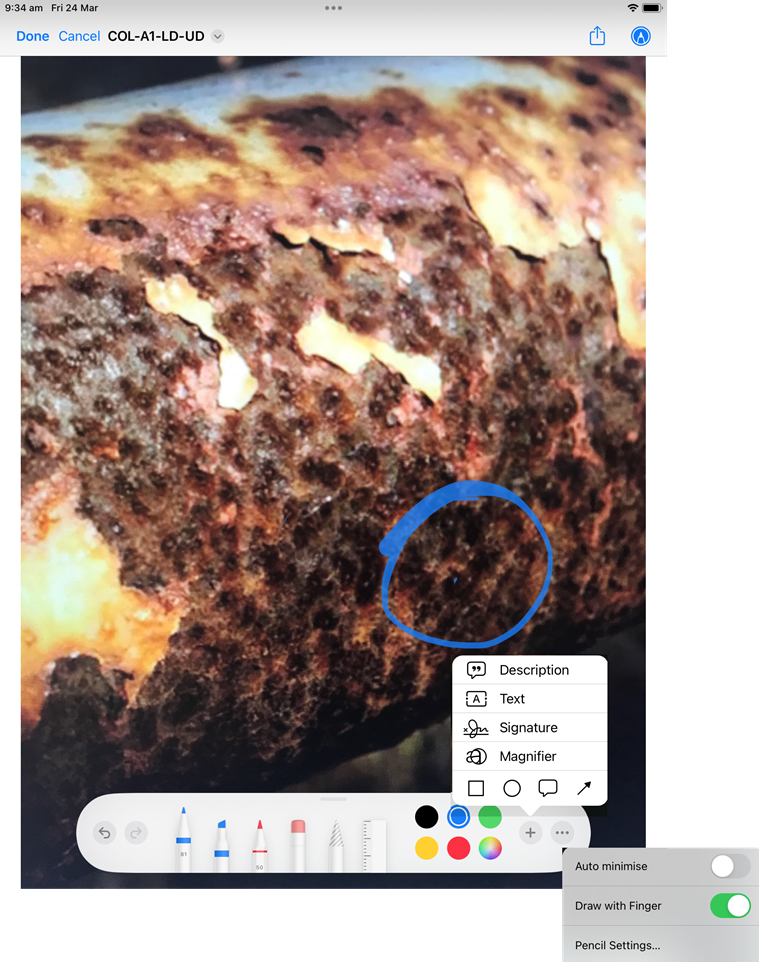
Markup
Tap on  to open the markup screen. Here, you can draw on the image, add text, shapes, and more.
The available markup tools vary depending on your platform:
iPad: Use Apple’s standard markup tools to edit your image.
Android: When you start editing, choose from the installed image editing apps. We strongly recommend using Google Photos for seamless integration with IC-Inspector. If you don’t have Google Photos, install it from the Google Play Store.
Windows: Use Microsoft Paint’s standard markup tools.
For more information on using the markup tools, refer to the platform-specific guidelines.
Below is an example of using markup tools on an iPad:
Rotate
You can rotate the image right or left by tapping  or
or  respectively. This rotates the image in 90° steps.
Crop and Rotate
On Android and Windows platforms, you can crop and rotate images using the markup tool of the platform (see above).
On iPads, you can tap  at the top of the screen to access the crop-and-rotate screen.
Use the slider at the bottom of the screen to rotate the image by an arbitrary angle, from 180° anticlockwise to 180° clockwise. Or tap any of the five buttons below the slider to select specific angles.
Note
Using angles other than -180°, -90°, 0°, 90° or 180° will crop away part of your image.
If required, you can also crop your image.
Share
To share the marked-up image, tap  and choose from the available sharing options provided by your platform.
Note
On Windows tablets, you can only save the marked-up image.
Delete
Tap  to delete this image and return to the Event Details screen (see Maintain Event Details). This is different from tapping the Event Details button at the top left, which will return you to Event Details without deleting the photo.