Configure Traffic Lights
Traffic lights appear as coloured dots next to each asset in the asset tree. You can display them by selecting the required traffic lighting option from the Traffic Lighting toolbar button (see Traffic Lighting).
You set up the traffic lighting rules under .
NEXUS predelivers the Traffic Lights asset information group (AIG), which centralises the asset information fields used for traffic lights. This allows you to review all traffic lights for an asset in one place. You can also define colour fields in this AIG.
Set up Traffic Lighting Rules
Traffic lighting rules define how coloured dots are shown next to assets in the asset tree. A rule can determine the colour in one of two ways:
by referencing a calculated colour field in an AIG, or
by using manually defined overlay values that map field values to colours.
The Configuration - Traffic Lights dialog under is divided into two main sections:
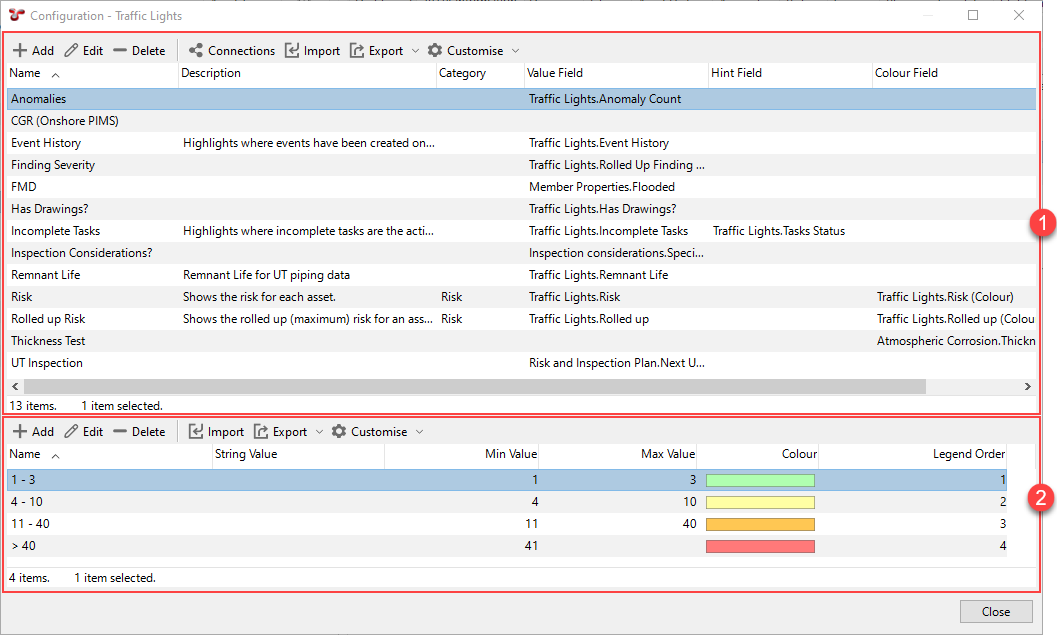
 Traffic Lighting Rule Configuration:
You use the standard grid toolbar (see Using the Grid) in the top section of the dialog to create, edit, delete, import or export traffic lighting rules or check connections. Choosing Add or Edit opens the Add/Edit Traffic Light dialog (see Add/Edit Traffic Light Dialog).
If a rule uses a colour field in an AIG, that calculated colour is used directly. In this case, overlay values are not required. For information about creating traffic lights using this method, see Create Traffic Lights Using AIG Colour Fields.
 Overlay Value Configuration:
You use the standard grid toolbar (see Using the Grid) in the bottom section of the dialog to create, edit, delete, import or export overlay values associated with the selected rule. Choosing Add or Edit opens the Add/Edit Overlay Value dialog (see Add/Edit Overlay Value Dialog).
If no colour field is specified, you must define overlay values to map the Value Field to colours. For information about creating traffic lights using this method, see Create Traffic Lights Using Overlay Values.
Create Traffic Lights Using AIG Colour Fields
If the Traffic Lights AIG contains colour fields with functions that calculate a colour, you can reference these fields directly in your traffic lighting rules. To use this method:
Choose from the menu.
In the Configuration - Traffic Lights dialog, choose Add from the top toolbar.
In the Add Traffic Light dialog (see Add/Edit Traffic Light Dialog), enter the required details and in the Colour Field field, select the colour field defined in your AIG.
Save your entries.
Create Traffic Lights Using Overlay Values
If you do not define a colour field in the AIG, you can manually specify overlay values instead. Overlay values map the values of the Value Field to specific traffic light colours. To set up a traffic lighting rule using overlays:
Choose from the menu.
In the Configuration - Traffic Lights dialog, choose Add from the top toolbar.
In the Add Traffic Light dialog (see Add/Edit Traffic Light Dialog), enter the required details and leave the Colour Field field empty.
Save your entries.
In the Configuration - Traffic Lights dialog, select the traffic light you created and choose Add from the bottom toolbar to create the first overlay value.
Enter the required details in the Add Overlay Value dialog (see Add/Edit Overlay Value Dialog).
Save your entries.
Repeat steps 5 to 7 to define additional overlay values.
Set up Permissions
Permissions determine which users and groups can view or edit each traffic light. If you do not configure permissions, all users can view all traffic lights by default.
To configure permissions:
Edit a traffic light.
Choose the Permissions tab.
Click Add.
Double-click an empty field under User / Group and pick a user or group.
Under Permission, use the drop-down list to select a permission:
Read Only or Deny Write: the user or group can use the traffic light but cannot edit it.
Read/Write: the user or group can use and edit the traffic light.
Deny All: the user or group cannot view or edit the traffic light.
Take care not to deny access for all users, otherwise the traffic light cannot be deleted. See Manage User Security and Permissions for details on how permissions interact.
Save your entries.