Assign Risk Models and Scenarios
You can assign risk models to individual assets from the ASSETS, PLANNING or WORKPACKS screen as described below.
Prerequisites
You have set up risk charts and risk models as described in Configure Risk Charts and Configure Risk Models.
You have assigned the risk model to the asset type of the asset (see Assign Risk Models to Asset Type).
Processes
Assign Risk Model to Individual Asset
Select the asset from the asset tree and go to the Risk tab.
Click
 Assign to <name of asset> from the toolbar of the tab.
Select the required risk model from the list. The available risk models depend on your configuration settings (see Prerequisites above).
Choose OK.
Assign Risk Model to Assets in Bulk (Copy)
You can assign risk models to several assets at a time by copying the risk model assignment from an asset.
From the asset tree, select the asset whose risk model assignment you want to copy and go to the Risk tab.
Select the risk models that you want to copy and choose Copy from the toolbar of the tab and select whether you want to copy only the risk assessment or the risk assessment together with the scenarios.
Note that you will only be able to select valid assets from this dialog, that is, assets that already have the same risk model assigned cannot be selected.
In the dialog that appears, select the relevant assets from the asset tree. You can switch the asset view if required.
Click OK.
Result
The risk models are assigned to the selected assets together with the values assigned to factors and categories in the risk model.
Edit Risk Model Values and Assign Scenarios
You can edit values in the risk model and assign scenarios as required. Note that you cannot edit Pass Thru and Calculation values.
If you are using more than one scenario for a single asset, you must store the information that varies from one scenario to another as values within the risk model.
Select the asset from the asset tree and go to the Risk tab.
Click
Edit from the toolbar of the tab.
Make changes or view data as required:
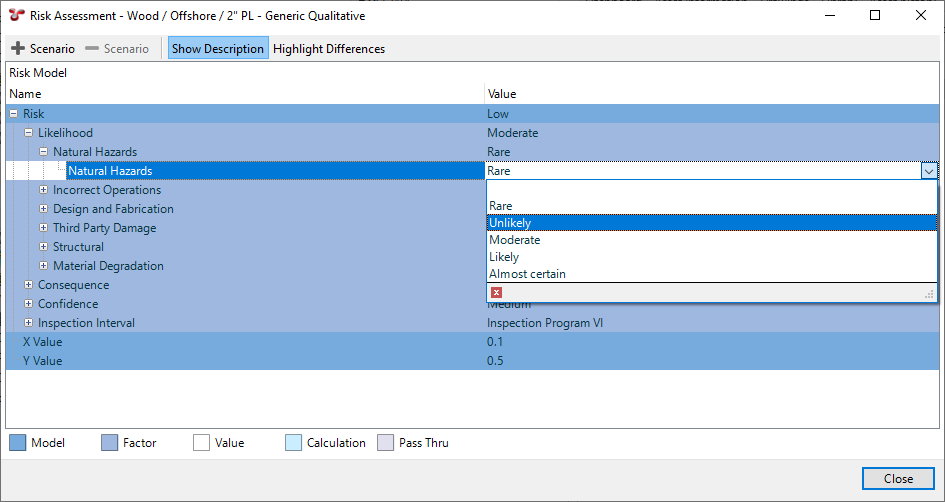
To change a value within the risk model, navigate to the relevant value node in the hierarchy (white row) and click in the Value column to change the value:

To assign a scenario, do the following:
Click
Scenario.
In the dialog that opens, select from the available scenarios or click Add to define a new one.
Click OK. A new column is added to the dialog for the added scenario.
Change values for the new scenario column as required.
To view the function and function results that have been assigned to a Factor or Model row, click the
at the end of the row.
Close the dialog.