Multimedia
Multimedia are electronic files that have been uploaded against an event.
You can view, add, edit or delete multimedia images associated with events on the Multimedia pane of the INSPECTION screen after selecting the relevant events on the Event Listing tab. Multimedia items are then displayed as thumbnails for the currently selected events.
Note
The following file formats are supported: GIF, JPG, JPEG, JFIF, TIF, BMP, PNG, PDF, DWG, CGM, DXF, SVG, WMF or EMF.
Add Multimedia Items
Follow the steps below to add new multimedia items to events:
Select the relevant event or events on the Event Listing tab.
Note
If you select multiple events, the multimedia file will be attached to all selected events.
Open the Multimedia pane.
Use one of the following methods to upload the file:
Choose
Add on the Multimedia pane to upload the file manually.
Drag & drop the multimedia file from Windows Explorer onto the Multimedia pane.
In the Add Multimedia dialog, enter a name for the multimedia (mandatory) and enter other parameters as required. For details, see Add/Edit Multimedia Dialog.
When adding the multimedia file manually, you can choose to Import or Link the file:
Import: Saves the file to the NEXUS IC database. Changes made to the original file on disk will not affect the stored version.
Link: Links to the original file on disk. Any changes made to the file will be reflected the next time it is viewed in NEXUS IC.
Note
If you drag and drop multiple files, they will be added, and then multi-selected in the grid. You can then click Edit to modify them in buld (see Multi-Edit). Drag and drop will import items, not link them.
Click OK.
Edit Multimedia Items
To edit an existing multimedia item, proceed as follows:
On the Multimedia pane, select the multimedia item.
Choose
Edit on the toolbar.
In the Edit Multimedia dialog, update data as required. For more information, see Add/Edit Multimedia Dialog.
Click OK to save your changes.
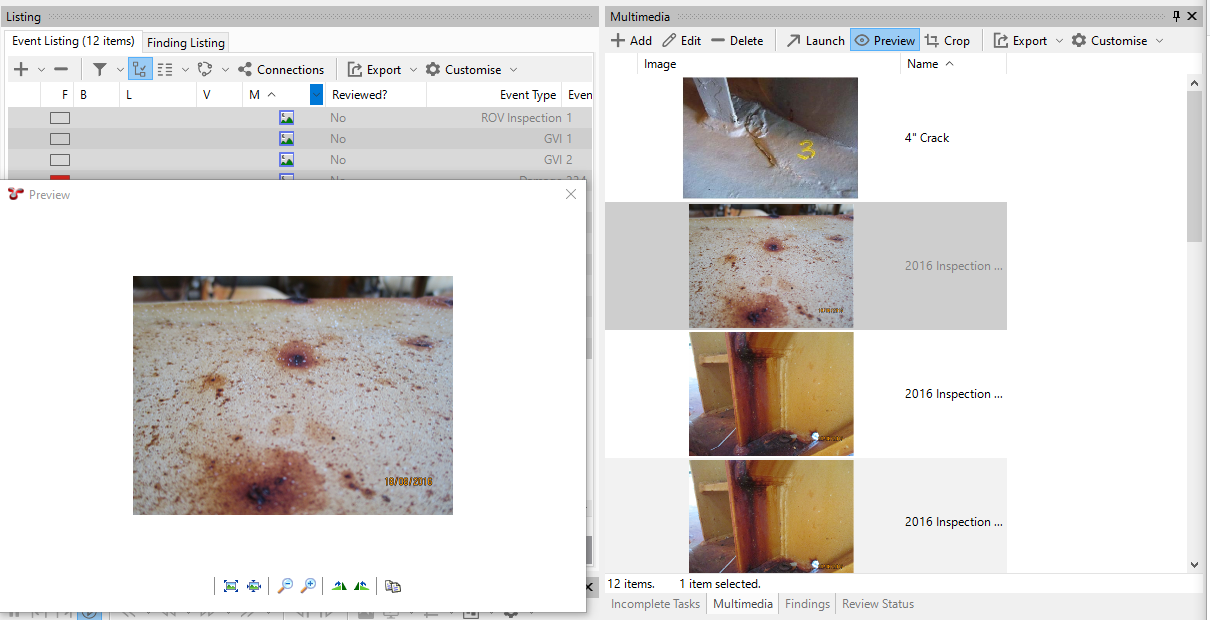
Preview Multimedia Items
If you click the Preview button on the Multimedia pane, you can open a floating window to display the selected image in full size. If the selected events contain more images and you scroll from image to image on the Multimedia pane, the Preview window gets refreshed with whatever image is selected.
Crop Multimedia Items
You can crop image files in the Multimedia pane as follows:
Select the file and click Crop in the toolbar.
Click Crop in the toolbar of the Edit Image dialog.
Click and drag a rectangle on the image as required.
Before completing the crop, click Keep Original if you want the new cropped image to be added to the event’s collection of images without overwriting the existing image. If you want to replace the existing image with the new cropped version, ensure Keep Original is not selected.
To complete the crop, click the
button, or choose Crop To Selection from the toolbar.
Multimedia Toolbar
You can use the following options in the toolbar of the Multimedia pane to perform actions on multimedia files:
Toolbar Option
Description
See Add Multimedia Items. You can only add new multimedia files to events on the INSPECTION screen, you cannot add new multimedia files on the ANOMALIES screen.
Launches the Edit Multimedia dialog. You can update and save the properties of the multimedia file. See Add/Edit Multimedia Dialog.
Deletes the currently selected multimedia records. If multiple multimedia items have been selected, then a dialog pops up that shows how many multimedia items will be deleted and prompts you to confirm by clicking Delete.
Launches the currently selected multimedia file into the default Windows viewer for the selected file type. Note that if your image viewer supplies “Next” and “Previous” buttons, these will show you the next and previous files in the temp folder, which may not be the next and previous images in NEXUS.
See Export.
See Customise.