Configure Sensors
Under , you configure sensor data forms.
Sensor data is recorded against assets, at a series of points in time (for example, once per hour). (This feature was known as monitored data in NEXUS IC 5.)
You can maintain sensor data forms from the Configuration - Sensors dialog as follows:
In the top half of this dialog, you can add, edit and delete sensor forms. You can use the standard toolbar functions for maintaining the forms (see Using the Grid). In addition, you can:
Use the Field Order button to move a field up or down in the form or grid. For example, if you want to place a field between two other fields in the form, select Form … from the drop-down list, and in the Form Field Order dialog, you can move the field with the Move Up or Move Down buttons available in the toolbar.
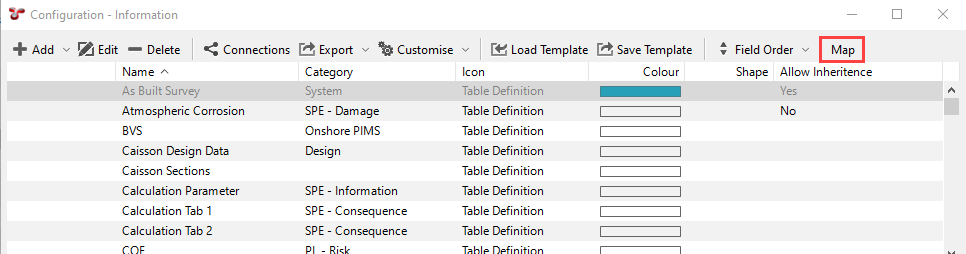
Check the dependency map using the Map button (see View Dependency Map).
In the bottom half, you can add, edit or delete fields within the sensor data forms and use the standard toolbar functions for maintaining the fields within the forms (see Using the Grid). You can also review how fields appear in the form or grid layouts.
Note that the Clock field is part of each sensor data form by default. Typically, a sensor will only have a single numeric field configured. However, if your sensor data type has more than one field, then the Sparkline chart shown on the sensors grid will display the data from the field that is ordered first. See Sensors for more information on the Sensor Sparkline chart.
Create Sensor Data Forms
See the steps below for the basic process of creating a new sensor data form:
Under , click :menuselection:`Add –> Sensor` at the top of the Configuration - Information dialog
.
The Add Table Definition dialog appears. The title of the dialog reflects that form data is stored in tables in NEXUS IC.
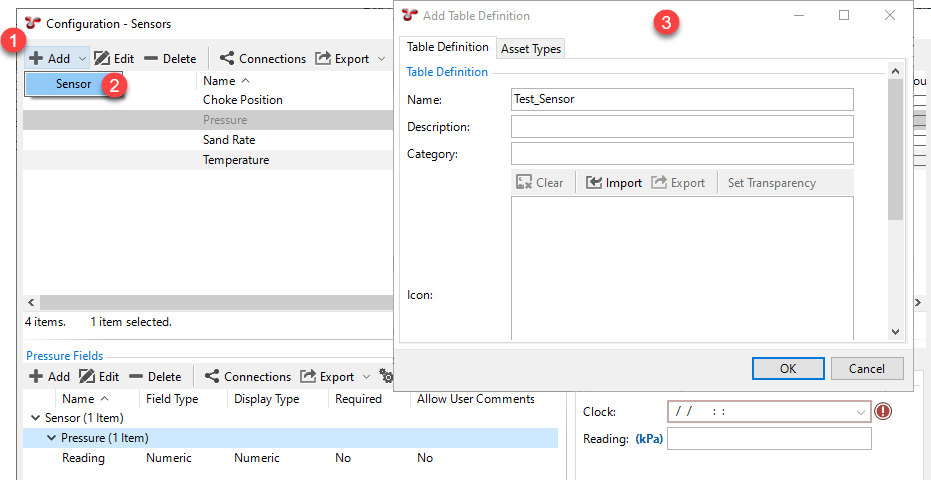
Specify the main table parameters in the Add Table Definition dialog
. For more information, see Add/Edit Table Definition Dialog.
Note
When you create the table for the first time, not all tabs are visible in the dialog. Save the table, select it and click Edit to return to the dialog with all the tabs visible.
Click OK.
Add new fields to the table by choosing Add from the bottom toolbar of the Configuration - Information dialog
.
The Add Field Definition dialog appears.
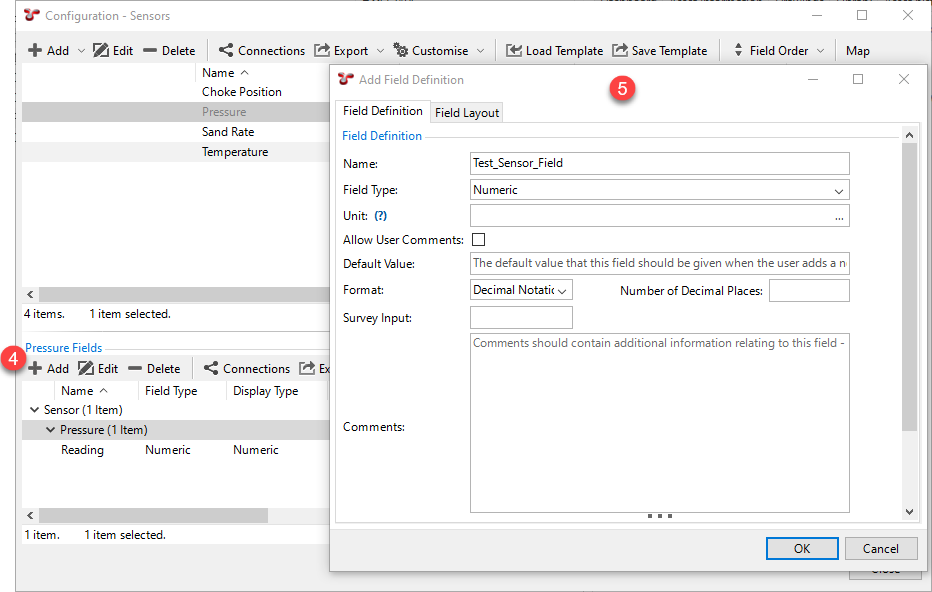
Note
When you create the field for the first time, not all tabs are visible in the dialog. Save the field, select it and click Edit to return to the dialog with all the tabs visible.
Specify the main field parameters in the Add Field Definition dialog
. For more information, see Add/Edit Field Definition Dialog.
Click OK.
View Dependency Map
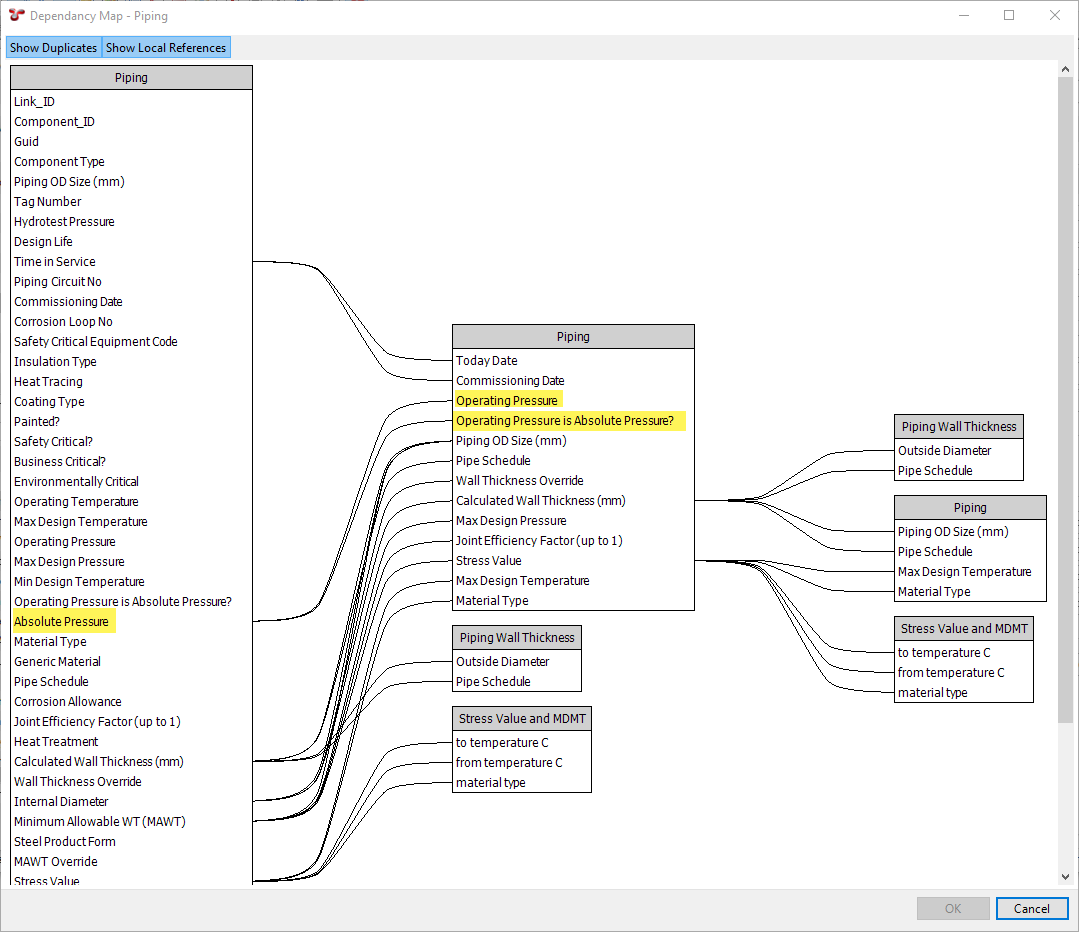
The dependency map is a visual representation of an Asset Information Group (AIG), Event Type’s, or global table’s dependencies.
You can access the dependency map by choosing Map in the toolbar of the configuration dialogs when configuring AIGs (see Configure Asset Information Groups), event types (see Configure Event Types) or global tables (see Configure Global Tables).
The map is represented as a series of interlinked fields grouped in columns, each column representing the AIG/Event Type/Global Table to which the fields belong.
The map is hierarchically arranged from left to right, with the target AIG/Event Type/Global Table located in the left-most column, and its dependencies and sub-dependencies located to the right.
You can also toggle the view using the following buttons at the top of the dialog:
Show Duplicates: If this button is switched on, and a field has a reference to another field in the same AIG/Event Type/Global Table, the field and the AIG/Event Type/Global Table will be displayed again in a separate column. If you switch this button off, the fields will be displayed only once and any self-referential dependencies will be displayed as a closed loop in a single column. For example, if you have a field called Absolute Pressure in the Piping AIG, which has references to two other fields from the same Piping AIG, the dependency map is displayed as follows:
Show Duplicates button ON:
Show Duplicates button OFF:
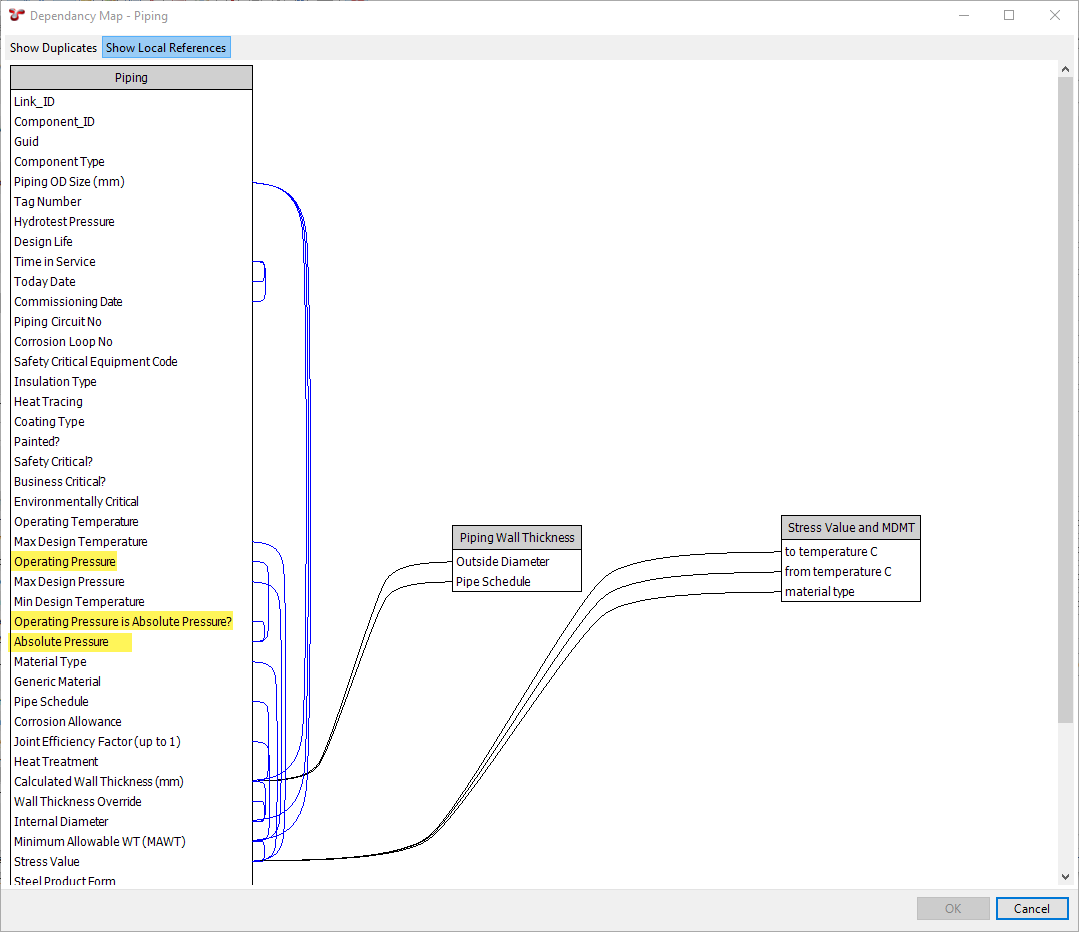
Show Local References: If this button is switched on, and a field has a reference to another field within the same AIG/Event Type/Global Table, this dependency will be displayed on the map. If you switch this button off, these self-referential dependencies will not be displayed at all. See how the example mentioned above is displayed when toggling this button on or off:
Show Local References button ON:
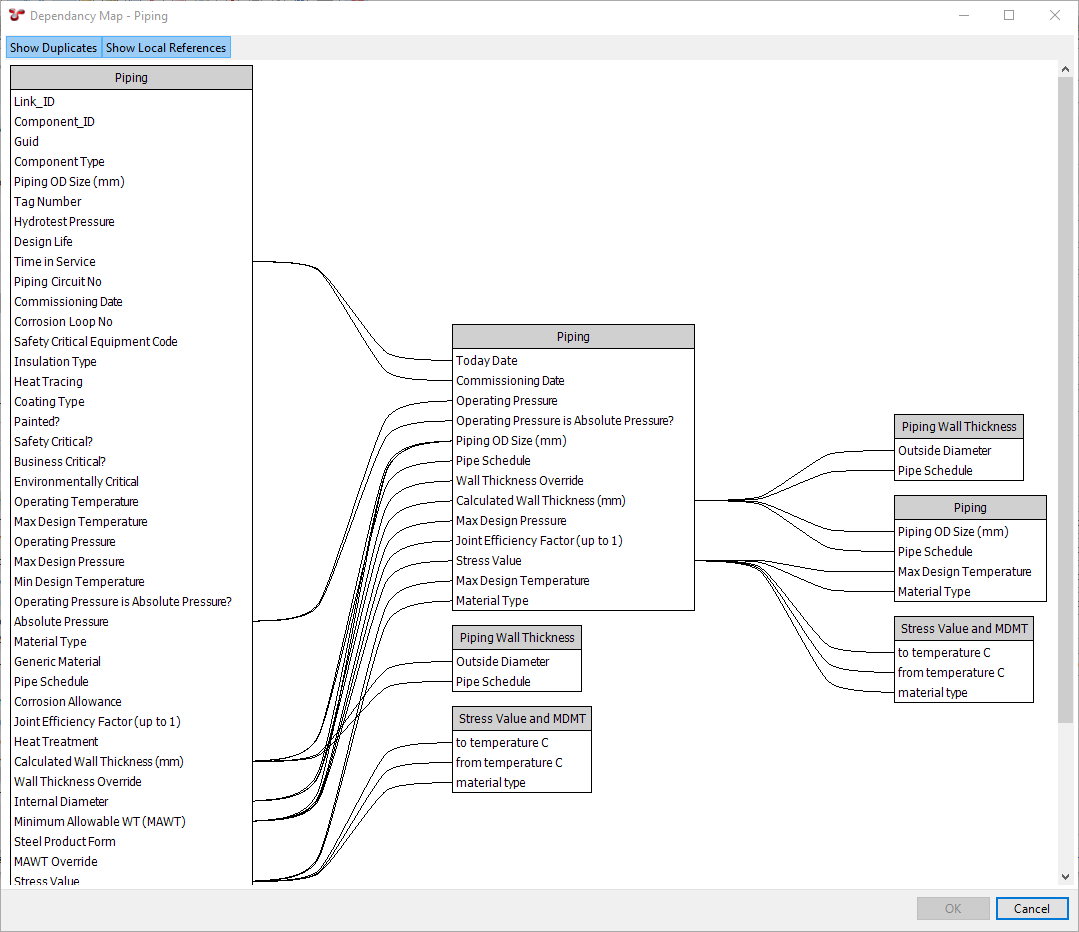
Show Local References button OFF:
