Create a Backup
You can create a backup of your NEXUS database any time, which allows you to restore your database later based on the backup file that you created. Your IT department may have a system of scheduled backups, thus, you may not need to create a backup on a regular basis. However, from time to time when you are about to do something hard to reverse in a database, such as deleting data, it is recommended that you take a backup first.
Prerequisites
Before you start, you can set up the default network path for backing up or restoring data under . For more information, see Setting Up Network Path for Backup/Restore.
Procedure
To create a backup, proceed as follows:
In the menu, navigate to Backup….
In the Database Backup Wizard, specify the network path and the name for the backup file.
The dialog offers you a default network path and name, which you can keep or overwrite as required.
Note
For hosted clients (SaaS), the network path and backup file name is predefined and cannot be changed.
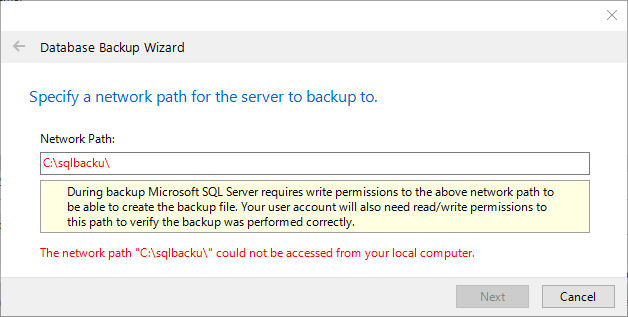
The system checks the validity of the specified path and highlights the text as follows:
If the path is invalid, the text appears in red colour and a message is displayed:
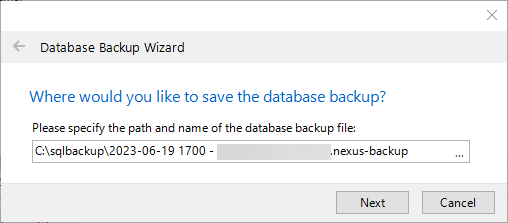
If the path is valid, the Wizard takes you directly to the screen that allows you to specify the name and path of the backup file and the text appears in black colour:
Note
To make the path valid, ensure the following:
The path must be accessible to both the database server and to Integrity Centre. This may be a UNC path (like ‘\\MyServer\MyShare’) or if the database server and Integrity Centre are running on the same machine it may be a Windows path (like ‘C:\Database Backups’).
The database server process must have permission to read and write the folder in question.
The user account requires read/write permissions to both the share (for UNC paths) and the folder.
Click Next.
The system creates the backup file in the folder that you specified.
Note
During backup, a checksum is embedded in the file using an SQL Server feature. When you restore the database from a file created in NEXUS (see Connect to Database), a validation is performed using the SQL Server checksum to ensure that the file is not corrupted.
Click Open Folder to open Windows Explorer with your new backup file selected.
Hint
You can set up the system to offer you the creation of a backup file whenever you start NEXUS. To do that, under , tick the Prompt to Backup Database on Startup checkbox.