Link Finding to Anomaly
When reviewing findings, the reviewing engineer has to decide whether the finding needs to be escalated to an anomaly. To do that, the finding record has to be linked to an anomaly.
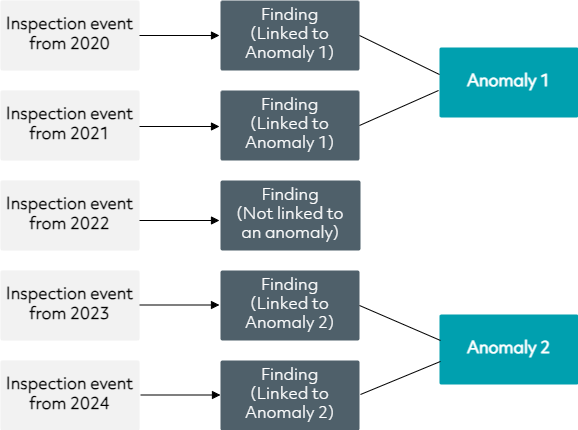
If an event is recorded and raised to a finding over different inspection years, these findings can all be linked to the same anomaly.
Once linked, you can launch the anomaly from the INSPECTION screen to edit it (see Launch Anomaly), or you can also unlink it (see Unlink Anomaly) any time.
Findings can be linked to anomalies from the INSPECTION screen in a number of ways:
Create Link With Event Listing Tab Active
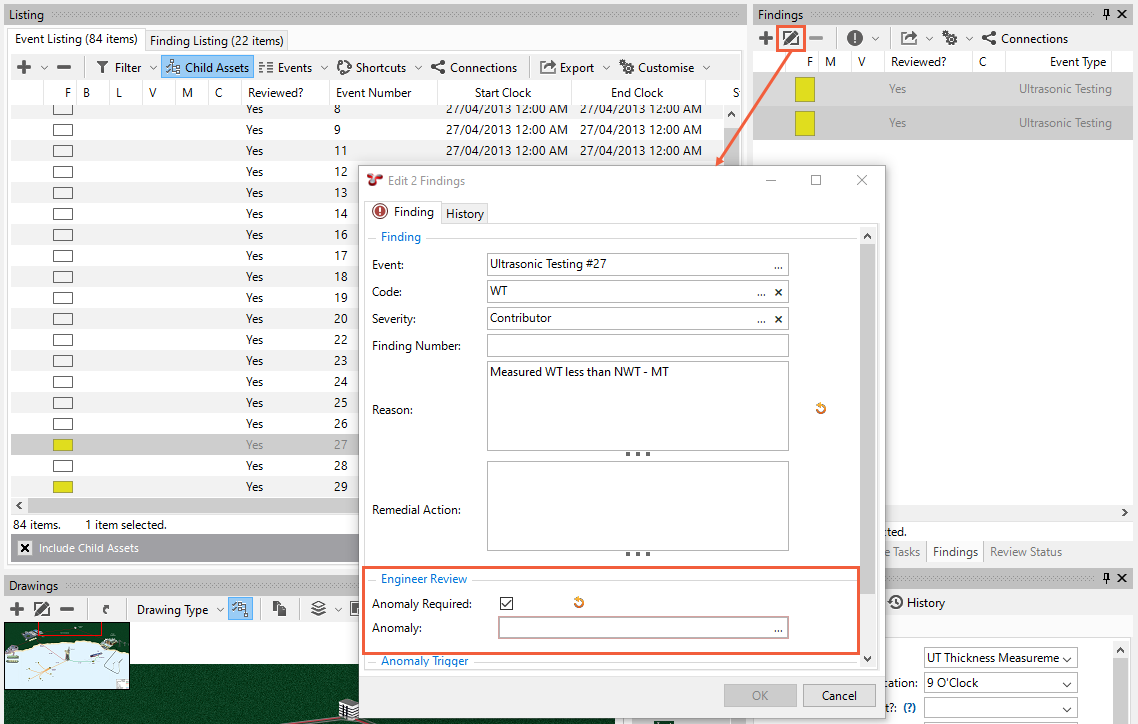
When the Event Listing tab is active, the Findings pane is visible, where you can link findings to an anomaly in the following ways:
You can create the link whenever you create (see Create Findings) or edit (see Edit Findings) findings. To add the link, in the Add/Edit Finding dialog, tick the Anomaly Required checkbox and from the Anomaly field, click
to select the anomaly or create a new one as required. You can also multiselect findings in the Findings pane to add the link to multiple findings at once:
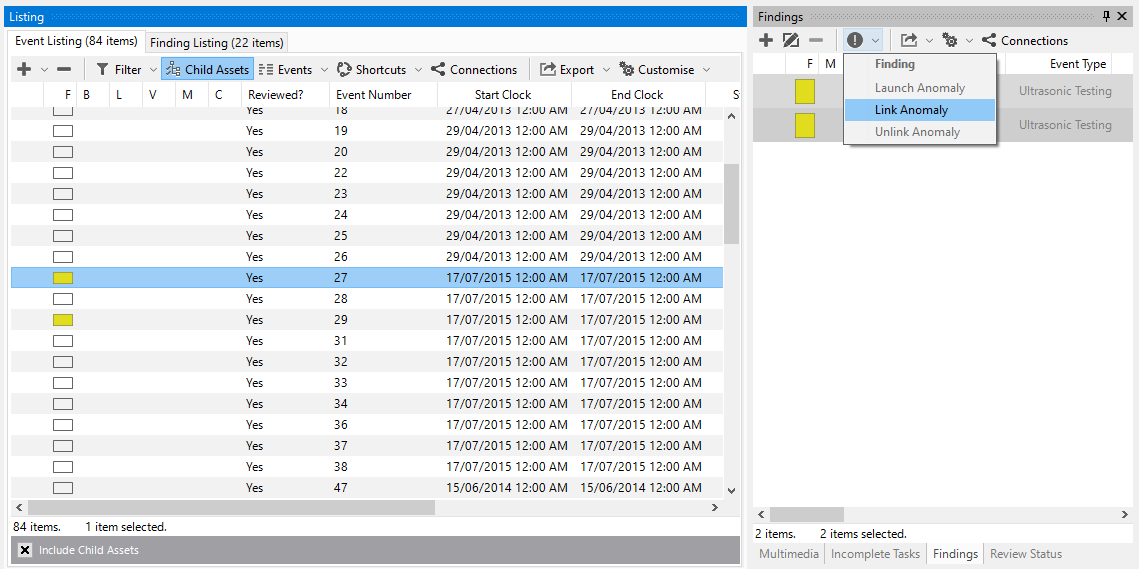
You can also select one or more findings directly in the Findings pane and choose Link Anomaly under the
Finding toolbar button. From the dialog that opens, you can select existing anomalies or create a new anomaly as required:
Create Link With Finding Listing Tab Active
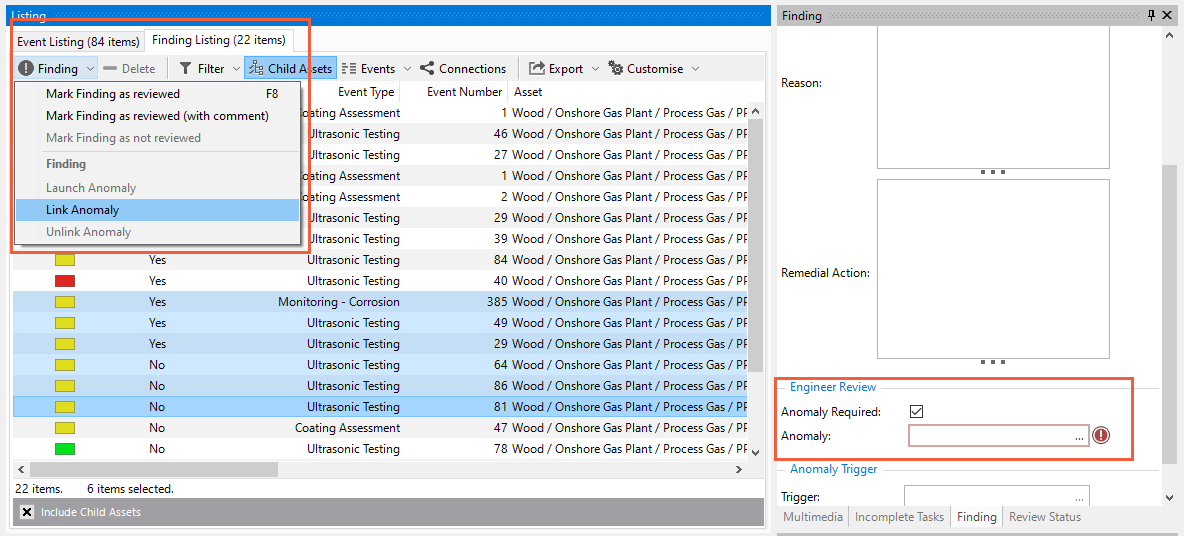
When the Finding Listing tab is active, you can select one or more findings in the grid and link them to an anomaly in the following ways:
You can select one or more findings directly in the Finding Listing tab and choose Link Anomaly under the
Finding toolbar button. From the dialog that opens, you can select existing anomalies or create a new anomaly as required.
You can select one or more findings in the Finding Listing tab, then on the Finding pane (visible only if the Finding Listing tab is active), tick the Anomaly Required checkbox and from the Anomaly field, click
to select the anomaly or create a new one as required.

Launch Anomaly
If a finding has been linked to an anomaly, you can launch the Edit Anomaly dialog for the linked anomaly and edit the anomaly as required. You can do that in the following ways:
When the Event Listing tab is active, you can choose Launch Anomaly under the
Finding toolbar button on the Findings pane.
When the Finding Listing tab is active, you can directly choose Launch Anomaly under the
Finding toolbar button on the Finding Listing tab.
Unlink Anomaly
If a finding has been linked to an anomaly, you can unlink it any time as follows:
When the Event Listing tab is active, you can choose Unlink Anomaly under the
Finding toolbar button on the Findings pane.
When the Finding Listing tab is active, you can directly choose Unlink Anomaly under the
Finding toolbar button on the Finding Listing tab.
This will disassociate the linked anomaly from the currently selected finding. The previously linked anomaly will not be deleted, and the finding will remain unchanged (other than not having a linked anomaly).
Note
Link Anomaly, Unlink Anomaly and Close Anomaly are Shortcuts. As such, if necessary, they can be debugged using the Shortcut debugger. When you select the menu item, hold down the Control key on the keyboard. After you have given any necessary input (such as selecting an anomaly for Link Anomaly) the Debug Shortcut dialog will appear. You can step through shortcut items one at a time, which may help to narrow down any problems.


