Create Template, Set Layout, Add Header, Footer, Title
As a first step, you create the report template, set up its size and layout, create a Section Break to define header and footer and add a Section Heading to add a title. See the detailed steps below:
Process
1. Create a new report template and specify the report layout.
In NEXUS IC, choose Configuration ‣ Reports and Dashboards ‣ Templates from the menu.
Choose Add to create a new report template.
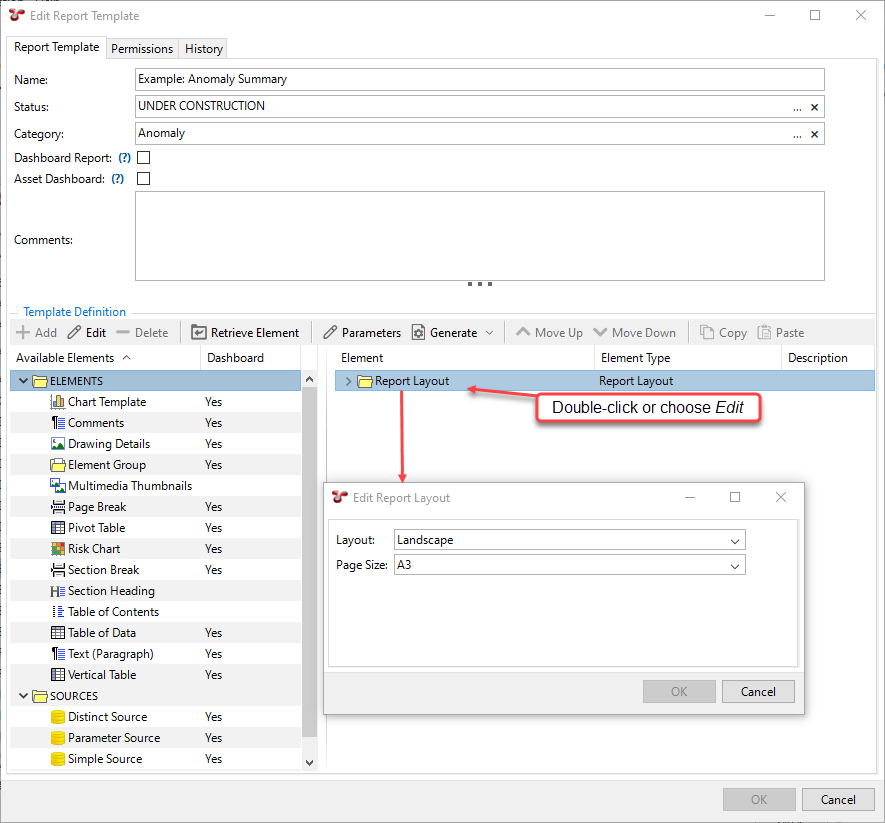
In the top half of the Add Report Template dialog, specify the name, status and category of the report as follows:
Name: Enter Example: Anomaly Summary
Status (optional): Select from the list of preconfigured statuses (see Configure Report Statuses), for example, Under Construction.
Category (optional): Select from the list of preconfigured categories (see Configure Report Categories), for example, Anomaly.
Under the Template Definition section of the dialog, configure the size and layout of the report by double-clicking the top Report Layout node on the right-hand side of the dialog. In this example, we select layout Landscape and page size A3.

Note
This size and layout settings will prevail until the next page break element, where you can overwrite these settings.
2. Insert a Section Break to set up the header and footer of the report.
You want to add a logo and the name of the report in the header of the report (2 columns) and in the footer, you want to add the generation date and software version in one column and the current page number in the second column. To do this, follow the steps below:
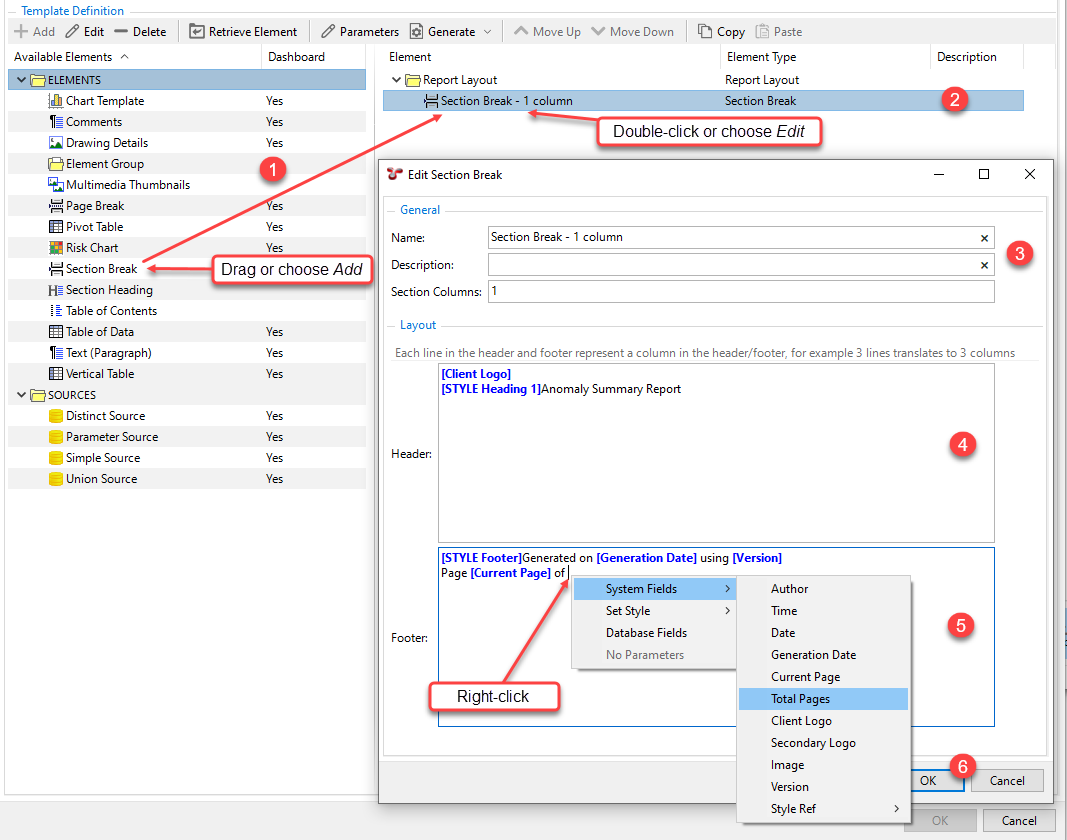
Under the Template Definition section of the Add Report Template dialog, select the Section Break element from under the ELEMENTS node and drag it under the Report Layout node on the right-hand side of the dialog. Alternatively, you can select the element and choose Add from the toolbar.
Double-click the Section Break element that you have inserted under Report Layout or select it and choose Edit.
Enter a name and description as required and leave the value 1 for Section Column.
In the header, you want the logo in one column and the title of the report in another column, thus, in the Header area of the dialog you enter 2 rows
:
Right-click in the editor area of Header and choose System Fields ‣ Client Logo.
Press Enter to create a new row.
You want to style the text of the report title with the predefined style Heading 1, so right-click and choose Set Style ‣ Heading 1.
Enter the name of the report Anomaly Summary Report.
In the footer, you want the generation date and software version in one column and the current page number out of the total page in the second column, thus, in the Footer area of the dialog you enter 2 rows
:
In the editor area of Footer, right-click to select the predefined Footer style and select Set Style ‣ Footer.
Enter Generated on.
Right-click and select System Fields ‣ Generation Date.
Enter using.
Right-click and select System Fields ‣ Version.
Press Enter to create a new row and enter Page.
Right-click and select System Fields ‣ Current Page.

3. Add a level-1 Section Heading.
To add a main title to the report, with Heading 1 style, proceed as follows:
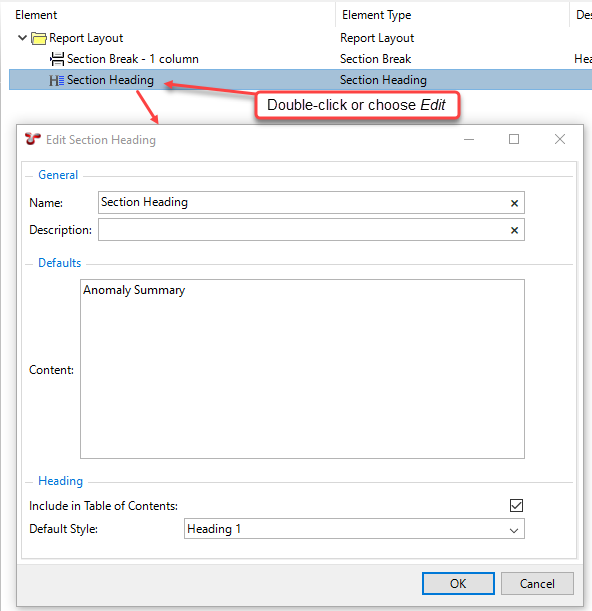
Add a Section Heading element to the Report Layout structure (see insertion methods above).
Double-click the element in the structure to edit it.
Enter a name that identifies the element in the structure. This text does not appear in the actual report output.
Enter the text of the heading that you want to see in the output in the Content field. This time, we just want to use the heading Anomaly Summary, but you can use right-click in this field if you want to add a variable.
Select the Include in Table of Contents checkbox to have this section heading appear in the Table of Contents.
In the Default Style field, select Heading 1, which is a preconfigured style that can be applied for level-1 section headings. If required, you can set up your own style and apply that instead (see Styles).
Click OK.


