Set up a Shortcut to Send an Email
The following process shows an example for setting up a shortcut that sends an email when data in an Asset Information Group (AIG) is edited and saved. In this example, we want NEXUS to generate an email each time when any data is edited on the Pipeline AIG.
Prerequisites
Ensure that you have set up your NEXUS email host settings and recipient email addresses. For more information, see Set Up Email.
Process
From the menu, choose and click Add in the Configuration - Shortcuts dialog.
Enter the name (mandatory) and category (optional) of the shortcut as required. You can also specify a description.
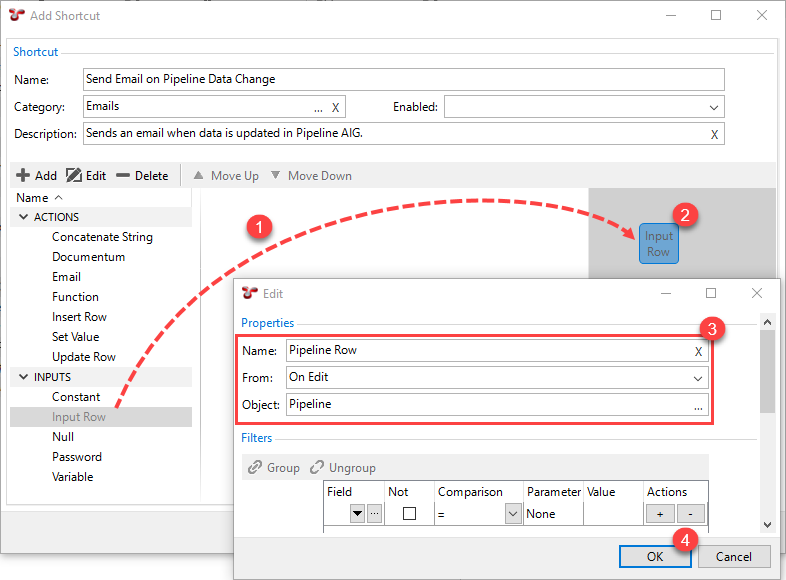
Set up the shortcut trigger. The trigger for sending the email will be data updates in the AIG titled Pipeline. For this, we need an Input Row element.
Under INPUTS, choose the Input Row element and drag it to the grey shortcut editor screen area
 .
.Double-click the new Input Row element
 .
.Define the element’s properties as follows
 :
:Name: Specify a unique name for the triggering element.
From: Choose On Edit from the drop-down list.
Object: Click the
 and select the AIG Pipeline from the list of tables.
Click OK
 .
.
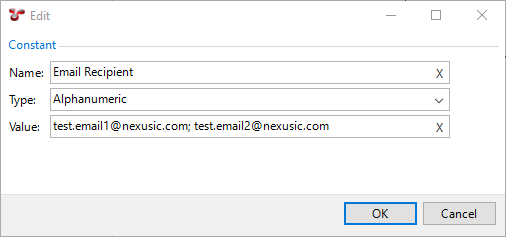
Similarly to the step above, add a Constant input element to define the email recipient. Define its properties as follows:
Name: Enter Email Recipient so that the element can be identified later.
Type: Specify Alphanumeric.
Value: Enter the email address to which you want to send the emails. If required, you can specify multiple email addresses separated by a comma or semicolon.
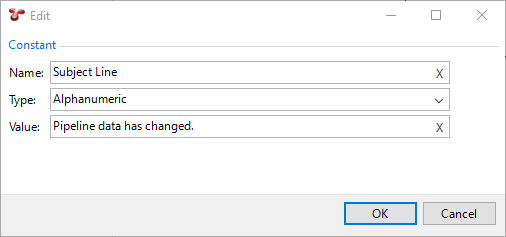
Add another Constant input element to specify the subject line. Define its properties as follows:
Name: Enter Subject Line so that the element can be identified later.
Type: Specify Alphanumeric.
Value: Enter the text that you want to appear in the subject line of the email, in this case, Pipeline data has changed.
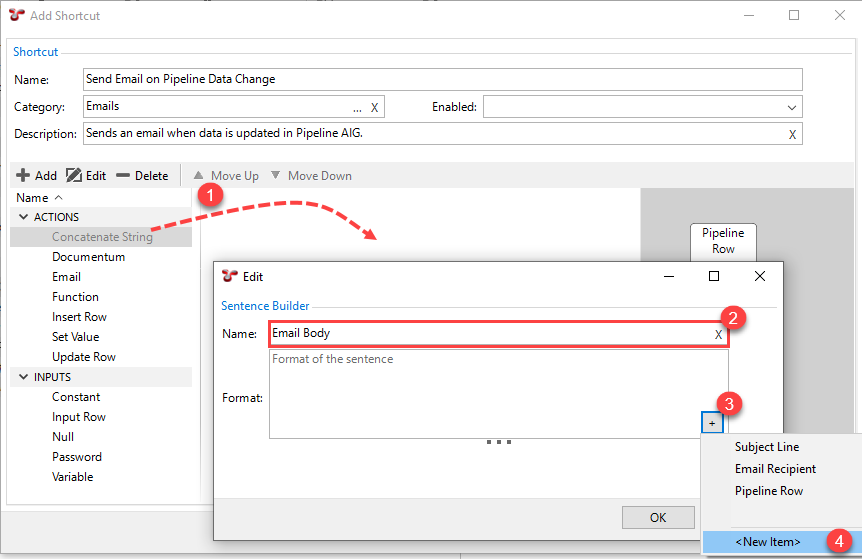
Set up the body text of the email by adding a Concatenate String action element. We want the body text to include the data of the pipeline AIG fields that have been changed.
Under ACTIONS, choose the Concatenate String element and drag it to the white shortcut editor screen area
.Enter the name of the shortcut element so that it can be identified later
.Click the + button in the bottom right hand corner of the dialog
.Choose New Item
.
In the New Shortcut Element dialog, define the element’s properties as follows:
Element Type: Select Field from Row. This indicates that the element will retrieve data from a field in a table row.
Row: Select Pipeline Row. This refers to the Input Row element that you created for the shortcut trigger.
Field: Select Pipeline Name. This refers to the field within the AIG, whose changes you want to track with this shortcut.
Return: Select Display Value. This will return the display value of a field, not the functional value. The functional value is usually a unique identifier in the database table, which is not visible to the end users. The display value is the user-friendly name of the field selected above.
Name: This field is automatically filled by the system based on your selections above.
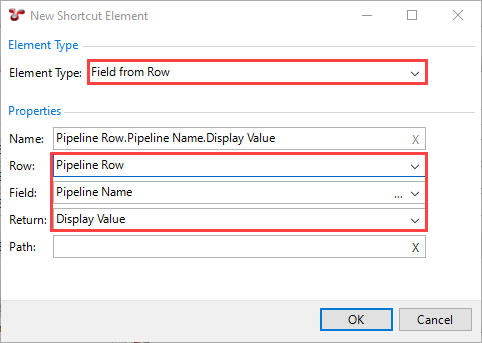
Click OK.
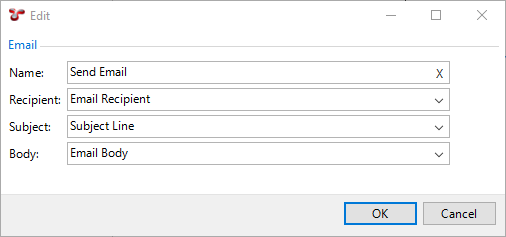
Set up the final action of sending the email by adding a new Email action element. Use the other shortcut elements defined above as input parameters:
Name: Enter Send Email so that the element can be identified later.
Recipient: Select Email Recipient, which refers to the constant input element that you defined for the recipient.
Subject: Select Subject Line, which refers to the constant input element that you defined for the subject line.
Body: Select Email Body, which refers to the Concatenate String action element that you defined in the previous step.
The shortcut is set up with all the parameters required. Enable the shortcut by selecting Yes in the Enabled field.
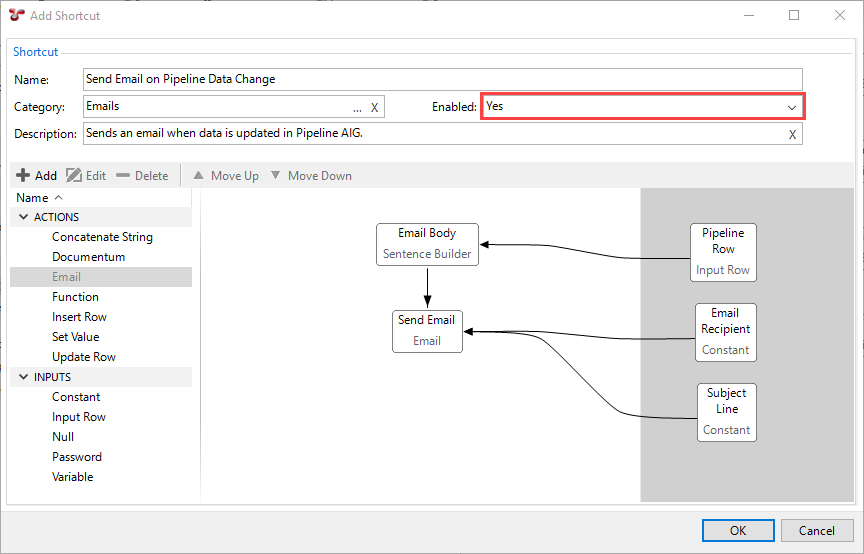
Click OK.
Close and reopen the database for your new shortcut to take effect.
To test this functionality, change some data in the Pipeline AIG and save your changes.
See also