Example: Configure Global Table for Global Table Link
The steps below show an example for setting up a global table that can be used in an Asset Information Group (AIG) using the Global Table Link field type. Once you have configured the global table, you can then assign it to the AIG as described in Example: Assign Global Table Link to AIG.
Process
From the menu, choose .
Add a new global table.
To add a new global table, click Add
 and select Lookup Table from the drop-down menu.
In the Add Table Definition dialog, enter the table name and category of the table in the Name and Category fields
 .
.Click OK to save the new global table
 .
.
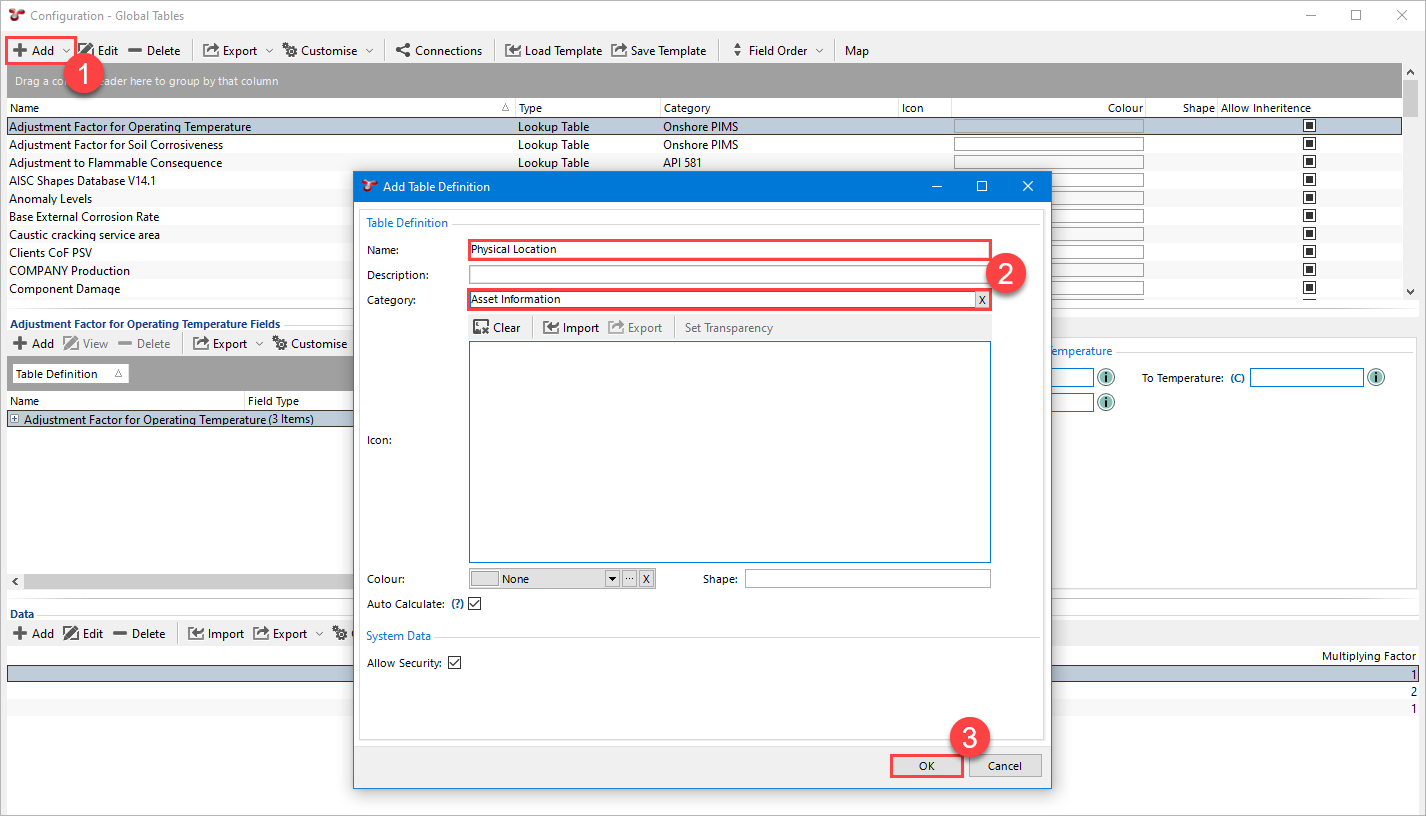
Configure global table fields.
Now that the global table has been created, you can add its fields. These will be points of user input where the user may choose from a list of predefined values. When creating a global table for use with a global table link, the first field will be a lookup list that lists the values based on which the remaining fields are filtered. Since the rest of the fields are dependant on this first lookup list field, they must be of type alphanumeric.
The steps and the screenshot below show the setup of the first field:
Click Add from the middle toolbar to add a new field
.Enter the field name in the Name field
, and select Lookup List from the drop-down list under the Field Type field .Link the field to a lookup list by clicking the ellipses in to the Lookup List field
 .
.In the Select Lookup List dialog, proceed in either of the following ways:
Create a new lookup list to be used in your global table. If you create a new lookup list, proceed to step 4.
Select an existing lookup list if that suits your purposes. In this case, proceed to step 5.
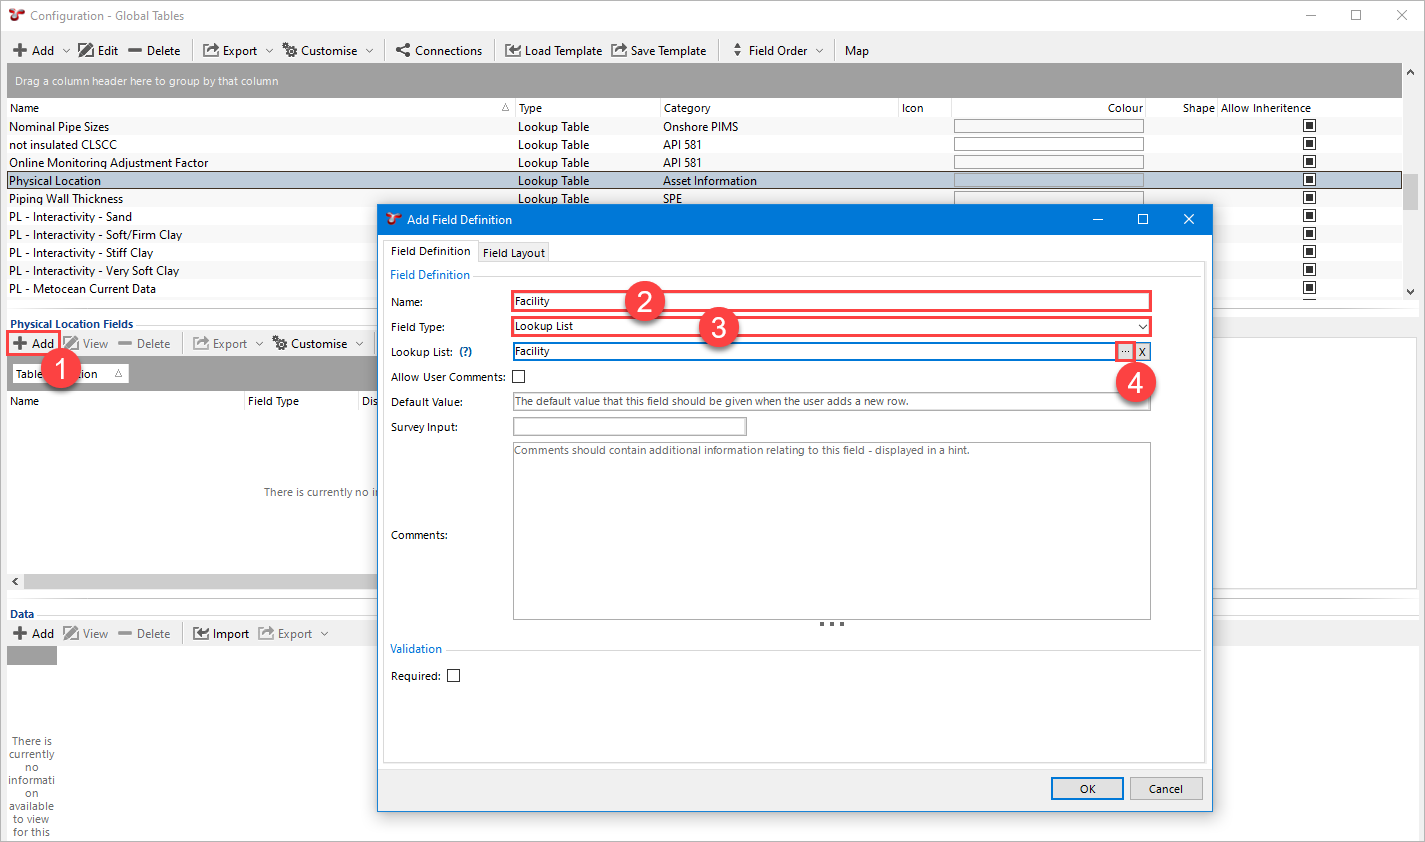
Create a lookup list.
To create a new lookup list, proceed as follows:
Click Add in the Select Lookup List dialog.
Enter a name and category for the lookup list as required.
Click OK.
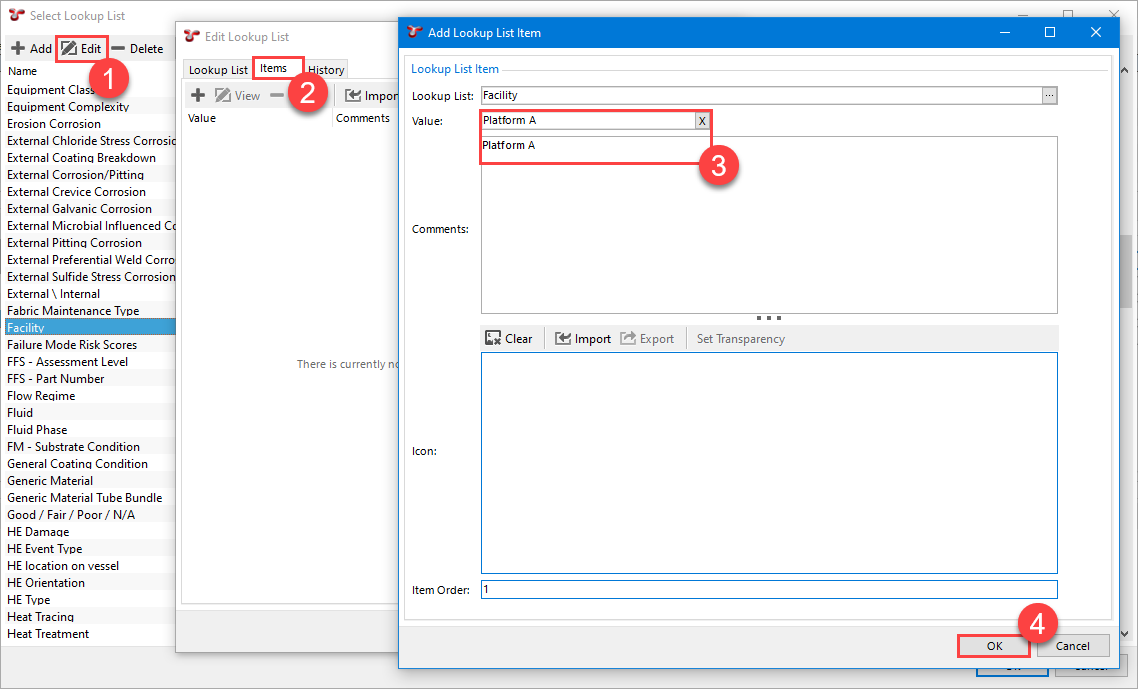
Start adding items to the lookup list by selecting it and clicking Edit
.Go to the Items tab
, and click Add to create the first lookup list item .Specify any values
you would like to be included in the first drop-down list in the global table form, which will then filter the options in the subsequent drop-down fields.Click OK to save these changes
 .
.Add other lookup list items as required.
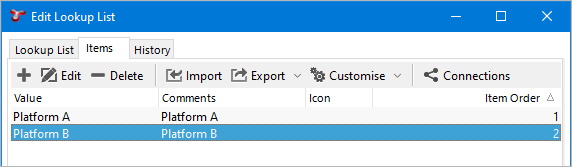
After adding the lookup list items, you can see all the items in the Edit Lookup List dialog as shown below. Click OK to save these changes and return to the Global Tables screen.
Create the remaining global table fields.
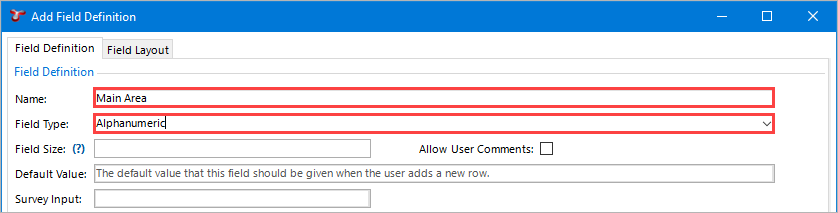
Now you can create the rest of the global table fields. For each of these remaining fields, use the field type Alphanumeric.
Adjust the form field order.
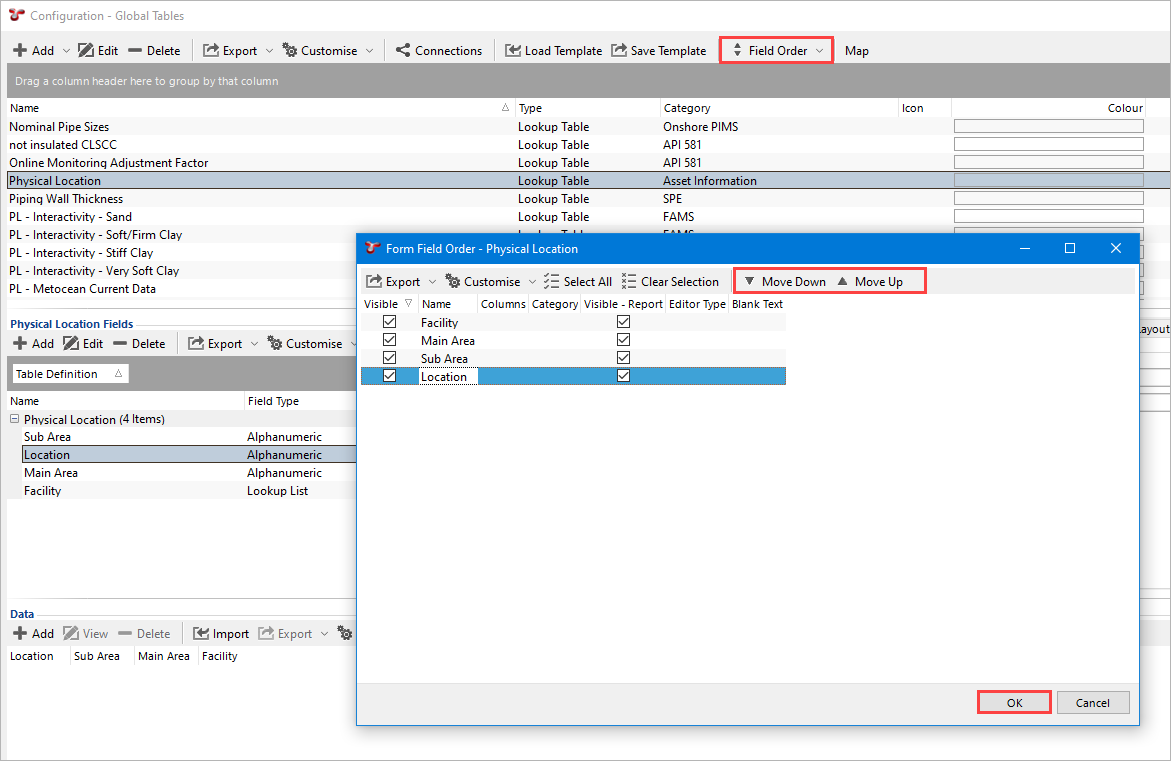
To order the fields correctly in the form, you can adjust their order as follows:
Choose Field Order -> Form from the top toolbar of the Global Tables screen.
Use the Move Down and Move Up buttons to change the order of the fields.
Click OK to save your changes.
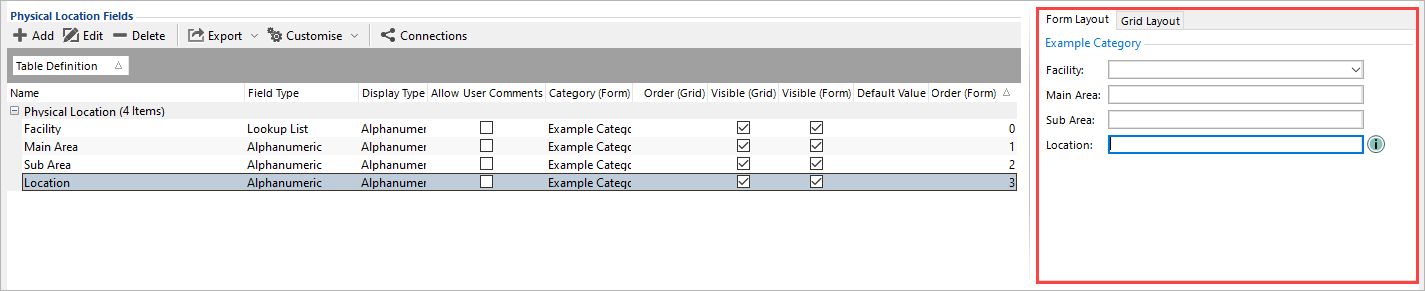
The screenshot below shows the fields after re-ordering. You can see the Form Layout preview on the right of the screenshot:
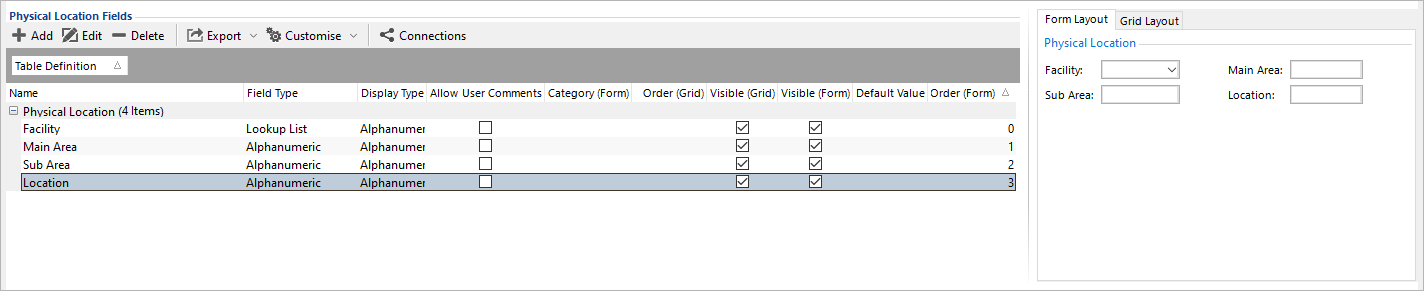
In this example, the Facility field will be presented first, giving the user a list of facility locations to choose from. The second field to appear in the form will be Main Area, and its options will be based on the user’s selection in the Facility field. Sub Area and Location will also be filtered based on the previous fields. This results in the last field in the form, Location, which will provide the most filtered and refined options available for selection.
Change the form field layout.
If you want to reformat how the fields are arranged, for example, each on a new line, or two fields per line, and so on, you can change these settings for each field as follows:
Select all the fields (CTRL + Click or SHIFT + Click)
.Click Edit
.On the Field Layout tab
, enter the number of columns you would like each field to take up .In the Category field, click the ellipses to access the Category dialog
and select or create a category with the required column value. The column value defines how many columns wide the form will be.
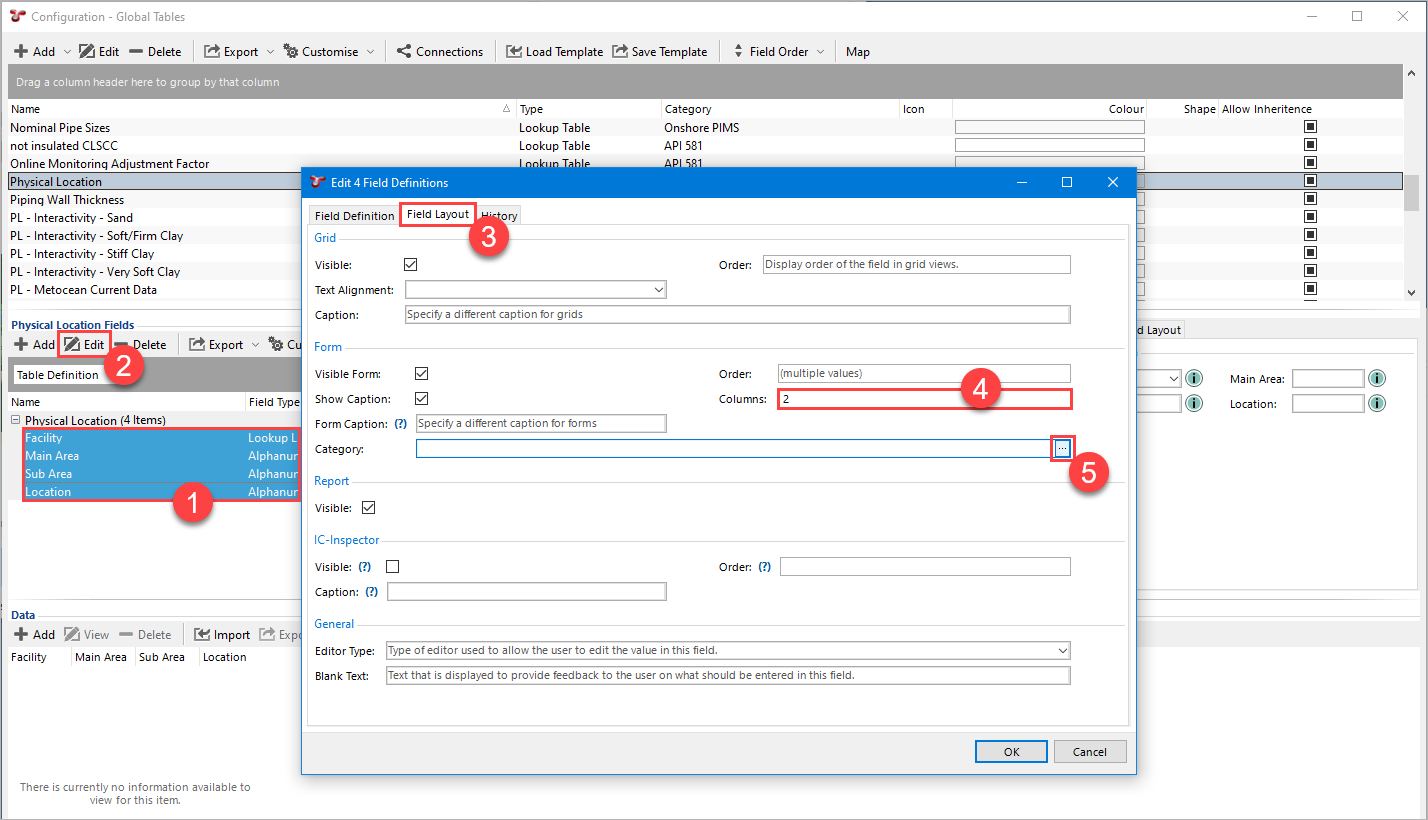
In this example, we choose Columns = 2 in the Field Layout, and Columns = 2 in the Category layout, setting each field on its own line:
Import the global table data.
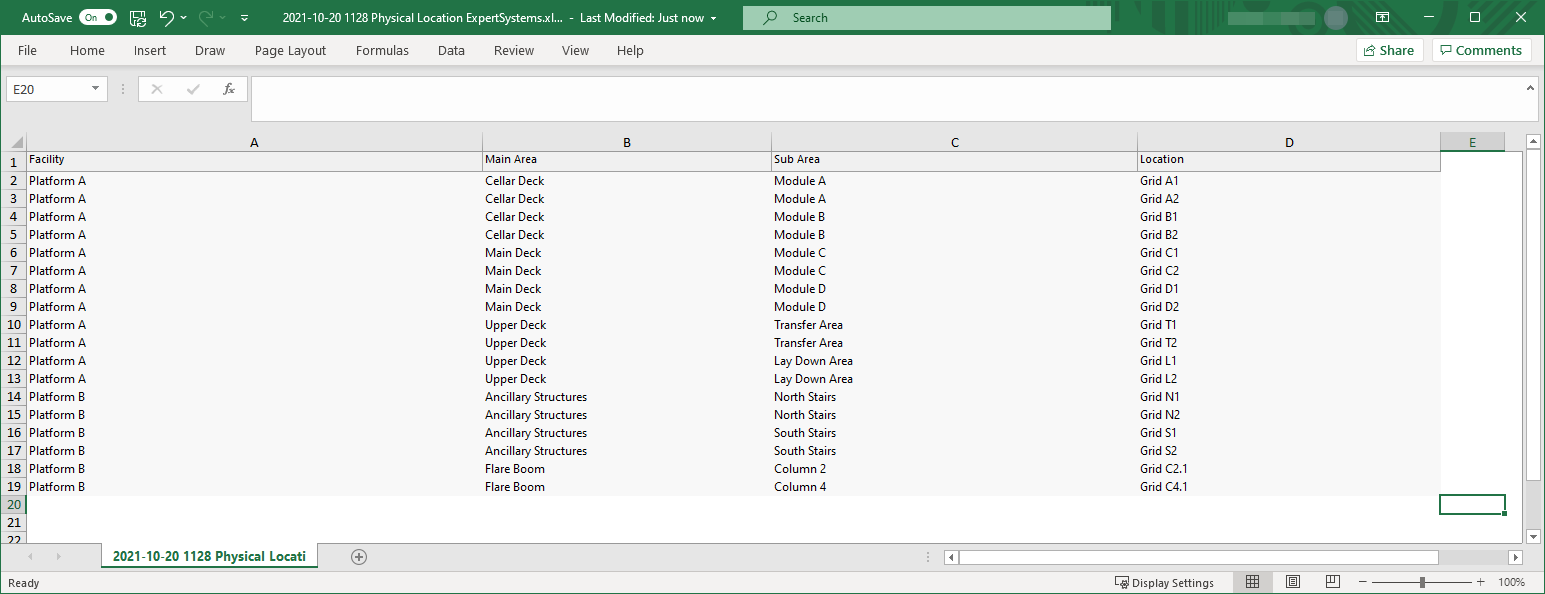
Now the global table is ready for data to be imported. The data sheet defines how each global table link field relates by listing each possible combination of entries into the form. See the example EXCEL data sheet below. Note that the headers correspond to the names of the global table fields:
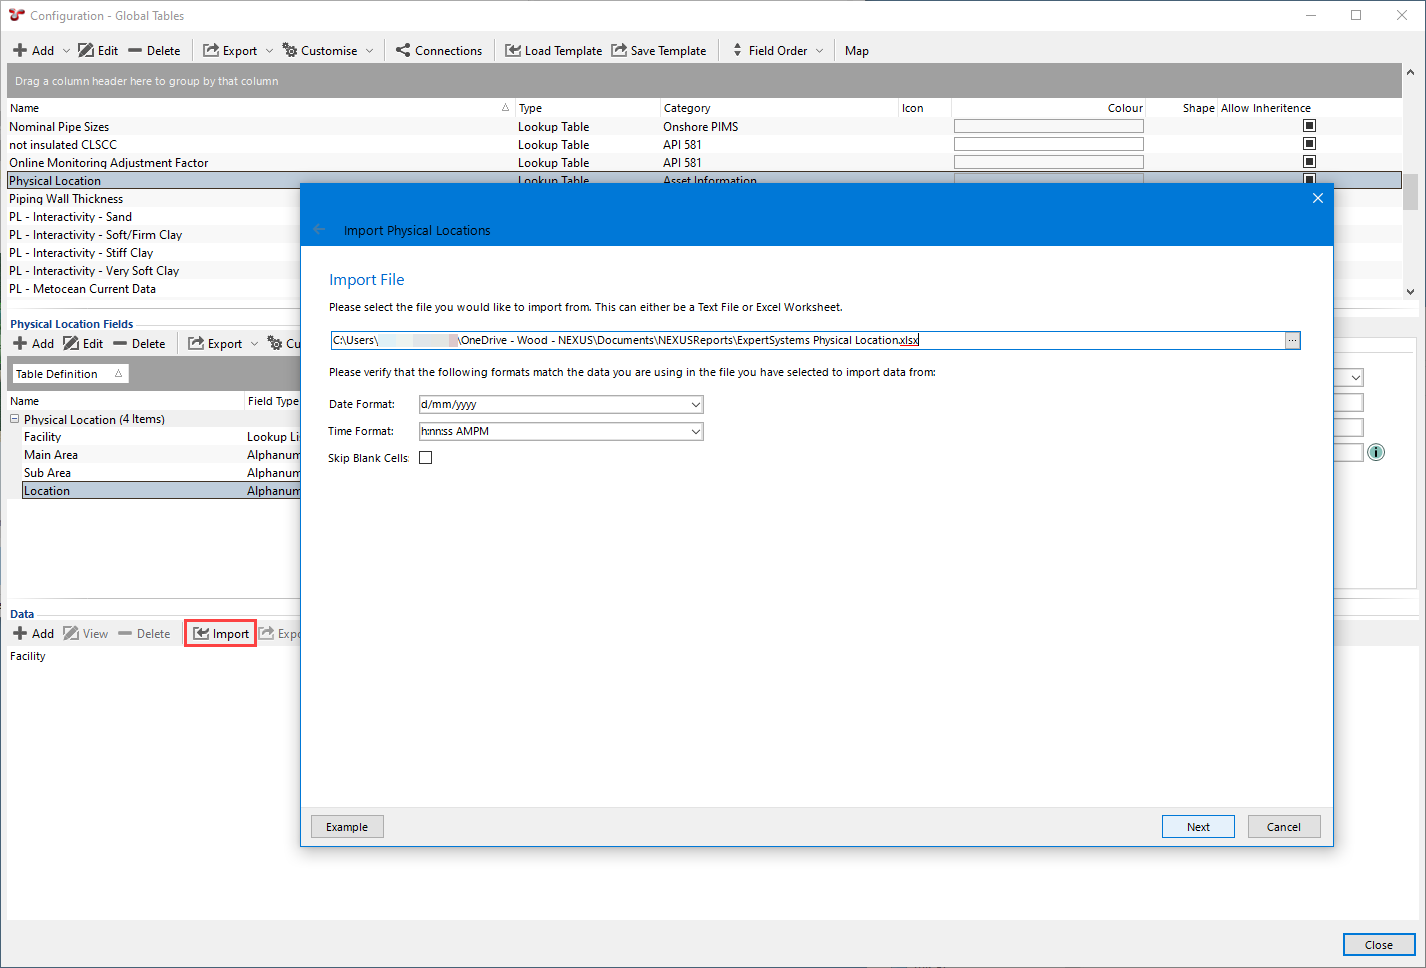
To import the sheet, proceed as follows:
Click Import under Data from the bottom toolbar.
In the import wizard select the file to be imported and go through the steps as required.
Result
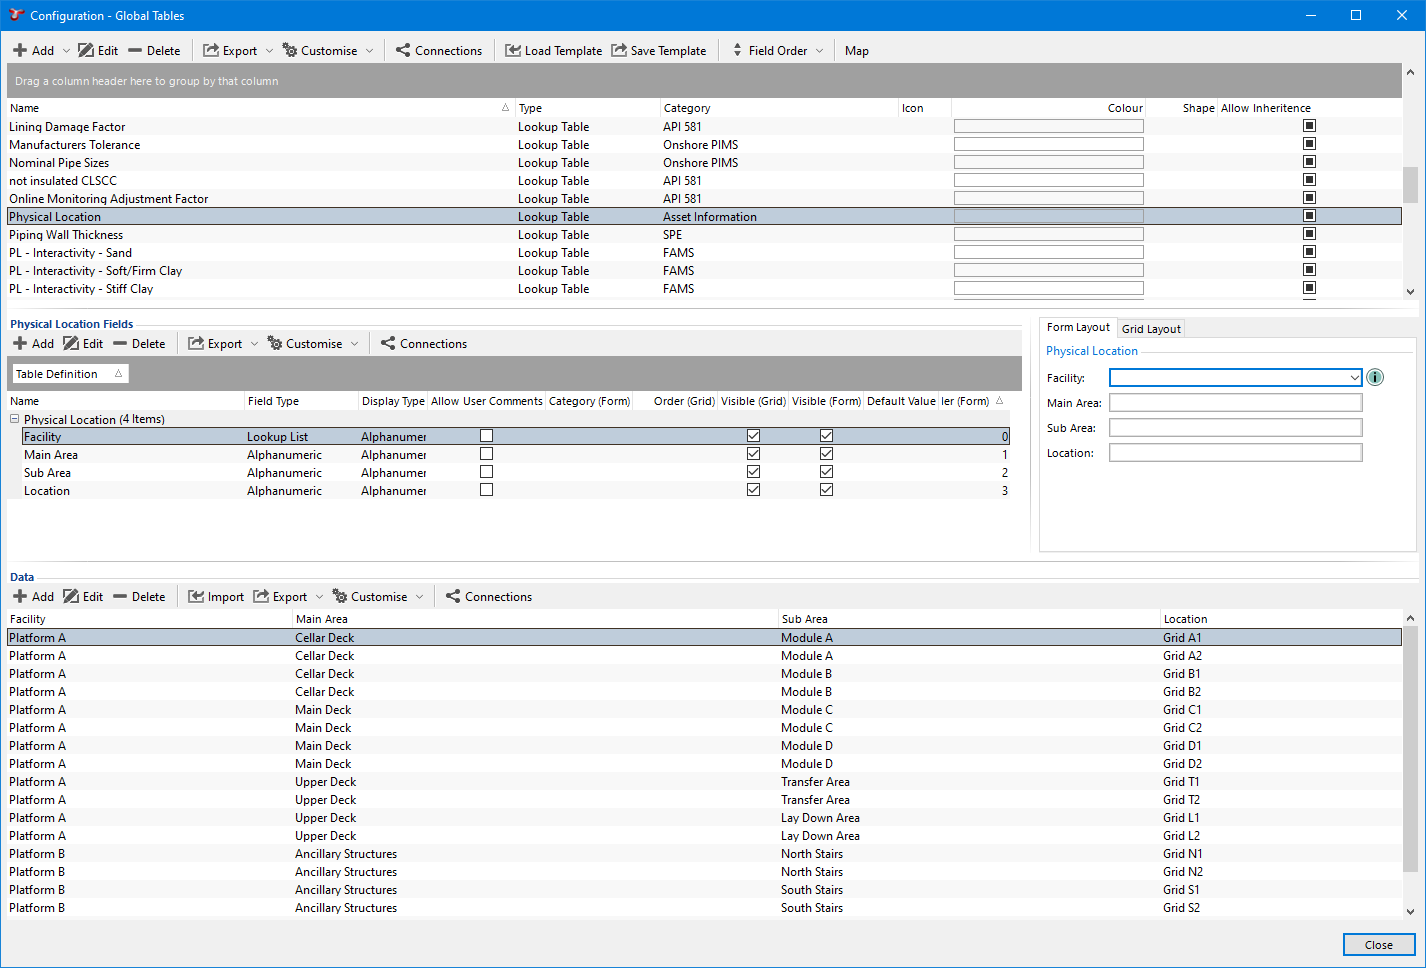
Once your data has been imported successfully, the Global Tables screen should look like the screenshot below. Note the order of the fields, the form fields formatted for one field per line, and the global table data visible under Data:
You can now link the global table to an AIG form as described in Example: Assign Global Table Link to AIG.