Toolbar
- , , :
- Add / Edit / Delete Report Template(s).
- Loads a previously saved .report template. Note that if the previously saved report template still exists in this database, Load Template will overwrite that existing report template — it will not create a new copy of it. Similarly with any other elements saved in the template file: asset information fields, functions, etc.
- Saves this report template and related details to a .report file. NEXUS IC will find all items related to this report template (functions, asset information forms, event definitions, chart templates, lookup tables, etc), and will present a dialog listing all the dependencies it’s found, with a checkbox for each row. Untick any that you don’t want saved with your report template.
- See Schedules below.
- Click to launch the Export Report wizard, to generate your report to RTF, HTML or Excel format.
- Click this to set the selected report template as the dashboard. Only one report template can be set as the dashboard at any one time.
- See Customise for full description of the Customise menu item.
- See Styles below.
Schedules
If your database is hosted on a Wood cloud server, you will see the Schedules toolbar button. Here you can configure scheduled reports to automatically run periodically, sending the output to users via email. Click Schedules to bring up the Scheduled Reports dialog. In this dialog, click Add to add a new scheduled report. Add one or more Recipients as a comma-separated list.
- Function
- The Function dialog allows you to select a function to determine the report generation’s behaviour upon being called at the scheduled time. The function will return either a Yes or No as its result. If Yes, the report is generated and the job is marked as completed. If No, the Report is not generated, and the job is also marked as completed. The function must not have any parameters.
- Include Date/Time in Filename
To include the Date/Time in the report filename, check the Include Date/Time in Filename checkbox. To leave it out from the filename, leave it unchecked.
- Example:
without Date/Time: test.rtf
with Date/Time: 2020-10-02 1012 test.rtf
Styles
The Styles dialog lets you define the look and feel of the final report by pre-defining the fonts and colours for the various styles in the report.
To edit the Styles used in reports, click the Styles button. Choose the Style to edit from the list box in the left of the dialog and update the font, colours, spacing, alignment and font style.
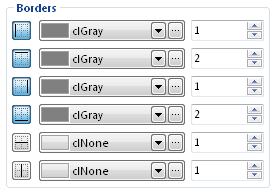
When defining borders for styles, you must ensure that the border icon is in the “down” state (see below).
Many of these styles are applied automatically to report elements where appropriate. For example, “Table Heading” will get applied to headings in tables (including Category bands); “Table Event Rows” will get applied to even-numbered data rows in tables, etc.
For Pivot tables, the following styles will be automatically applied (if they exist):
- Table Heading for headings
- Table Row Odd & Table Row Even for odd & even rows
- Number for cells that contain numbers
- Total for total cells
- Total Number for total cells that contain numbers
Styles are applied to Report elements additively, meaning default styles are applied first, then overwritten where element styles are embedded in the content field.
Note
Excel reports will ignore many style settings, in favour of using Excel’s own style settings. Excel does not respect the Default Style, but does respect the embedded Style selection in the content.
Note
In an RTF report, if the NEXUS style name matches the name of a style used by default in Word or that appears in your .dotx Word template file, the generated text will appear in that Word style, so you can use Word’s styling tools to modify it once the report has been generated.
Note
The Orientation setting, for orientations other than Normal, is poorly supported by many web browsers. It is known to be supported correctly by Chrome and Safari. For RTF reports, Word will correctly draw the text in the Up or Down direction, but will incorrectly calculate the height and width of that text, and therefore you may find vertical text wrapped unpleasantly.
Style Prefix
Table of Data, Vertical Table and Pivot Table offer a Style Prefix. If you fill this in, the table’s style prefix will be added in front of any style name applied. So if you set a prefix of “Large”, then the table’s heading cells will be styled in “Large Table Heading” instead of just plain “Table Heading”, and so on. This lets you apply different styles to a table or tables. (There is no automatic fallback, so if you specify a style prefix, you should create an appropriate matching set of table styles with that prefix, including as many of “Table Caption”, “Table Heading”, “Table Even Rows”, Table Odd Rows”, “Total”, “Number”, “Total Number” as you want formatted.)