Tools
Options
All options and settings in this dialog are currently user specific. The options and settings are stored in the windows folder: C:\Users\[USER_NAME]\AppData\Roaming\NEXUS
- Launches the Options dialog with the following tabbed pages:
General
- Prompt to backup database on startup - When checked, the ‘Database Backup’ wizard will be launched on login.
- Network path for backup/restore - This path must be accessible to both the database server and to Integrity Centre. This may be a UNC path (like ‘\MyServer\MyShare’) or if the database server and Integrity Centre are running on the same machine it may be a Windows path (like ‘C:\Database Backups’).
When the path is valid (i.e. it is visible to both Integrity Centre and the database server) it will have no border. If the path is invalid, a yellow border will be shown around the field.
Tip
The database server process must have permission to read and write to the folder. If the path is shown as invalid, check the permissions of the user account that the database server service is running under.
- Cache Folder - Drawings, Library Items and Multimedia images, when retrieved from the database for the first time are saved to this folder.
- Export Folder - This is the default path that NEXUS will use when exporting data.
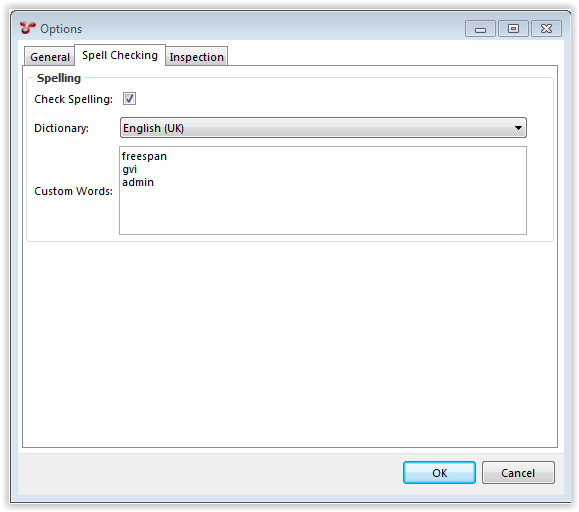
Spell Checking
- Spelling - When checked, typed data is spelled checked against the selected Dictionary.
- Custom Words - Enter words that should be ignored by the spell checker. Enter one word per line.

Inspection
Video
- Automatically switch to video time and sync KP: When enabled, the time source of Inspection Video’s automatically switches to Video Time, and Synchronise KP is turned on. This means the time source shown in the toolbar comes from the video time.
- Image Capture Format: Choose the format for inspection images to be captured in. Formats available are JPEG and PNG. Using JPEG can allow for smaller database size and quicker frame capture.
- Image Capture Naming: Choose the naming format that you want to apply for the captured images. The default format is yyyy-MM-dd HHmmss - <channel>, where Channel is the current video channel name.
- JPEG Quality (%): If JPEG is selected in Image Capture Format, the image quality can be controlled here. PNGs will always be full quality.
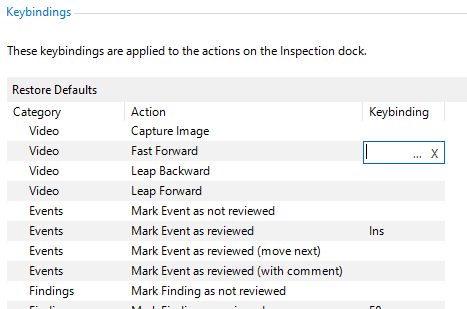
Keybindings
Inspection keybindings allow the user to assign Function keys and Numeric Keypad keys as shortcuts to common review actions within the Inspections Review screen. Click on the Restore Defaults button to pre-populate common keybindings. To assign a keybinding to an Action:
Parse Video
Clicking on an item in the Parse Video submenu causes NEXUS IC to read video and image files and store their properties (such as start time and duration) in the database. The datetime properties of the video and image files are the links to the events in the INSPECTION screen.
- Clicking Global Video parses all video and image files in the Global Video Path. (Typically you would use this option onshore.)
- Clicking Temporary Video parses all files in the Temporary Inspection Video Path. Files ending in ‘.uploaded’ will be ignored. (Typically you would use this option offshore.)
- Clicking All Video parses all files in both those locations.
The parsed videos and images will appear in the Video… dialog (see above).
As files are parsed, start time data will be read from the filename. After the parse completes, any files whose start time could not be read will shown in a list. These files will be present in the Configuration - Video dialog but cannot be uploaded until their names are edited to match one of the accepted filename formats.
See also How does video playback work?
 Ellipsis button.