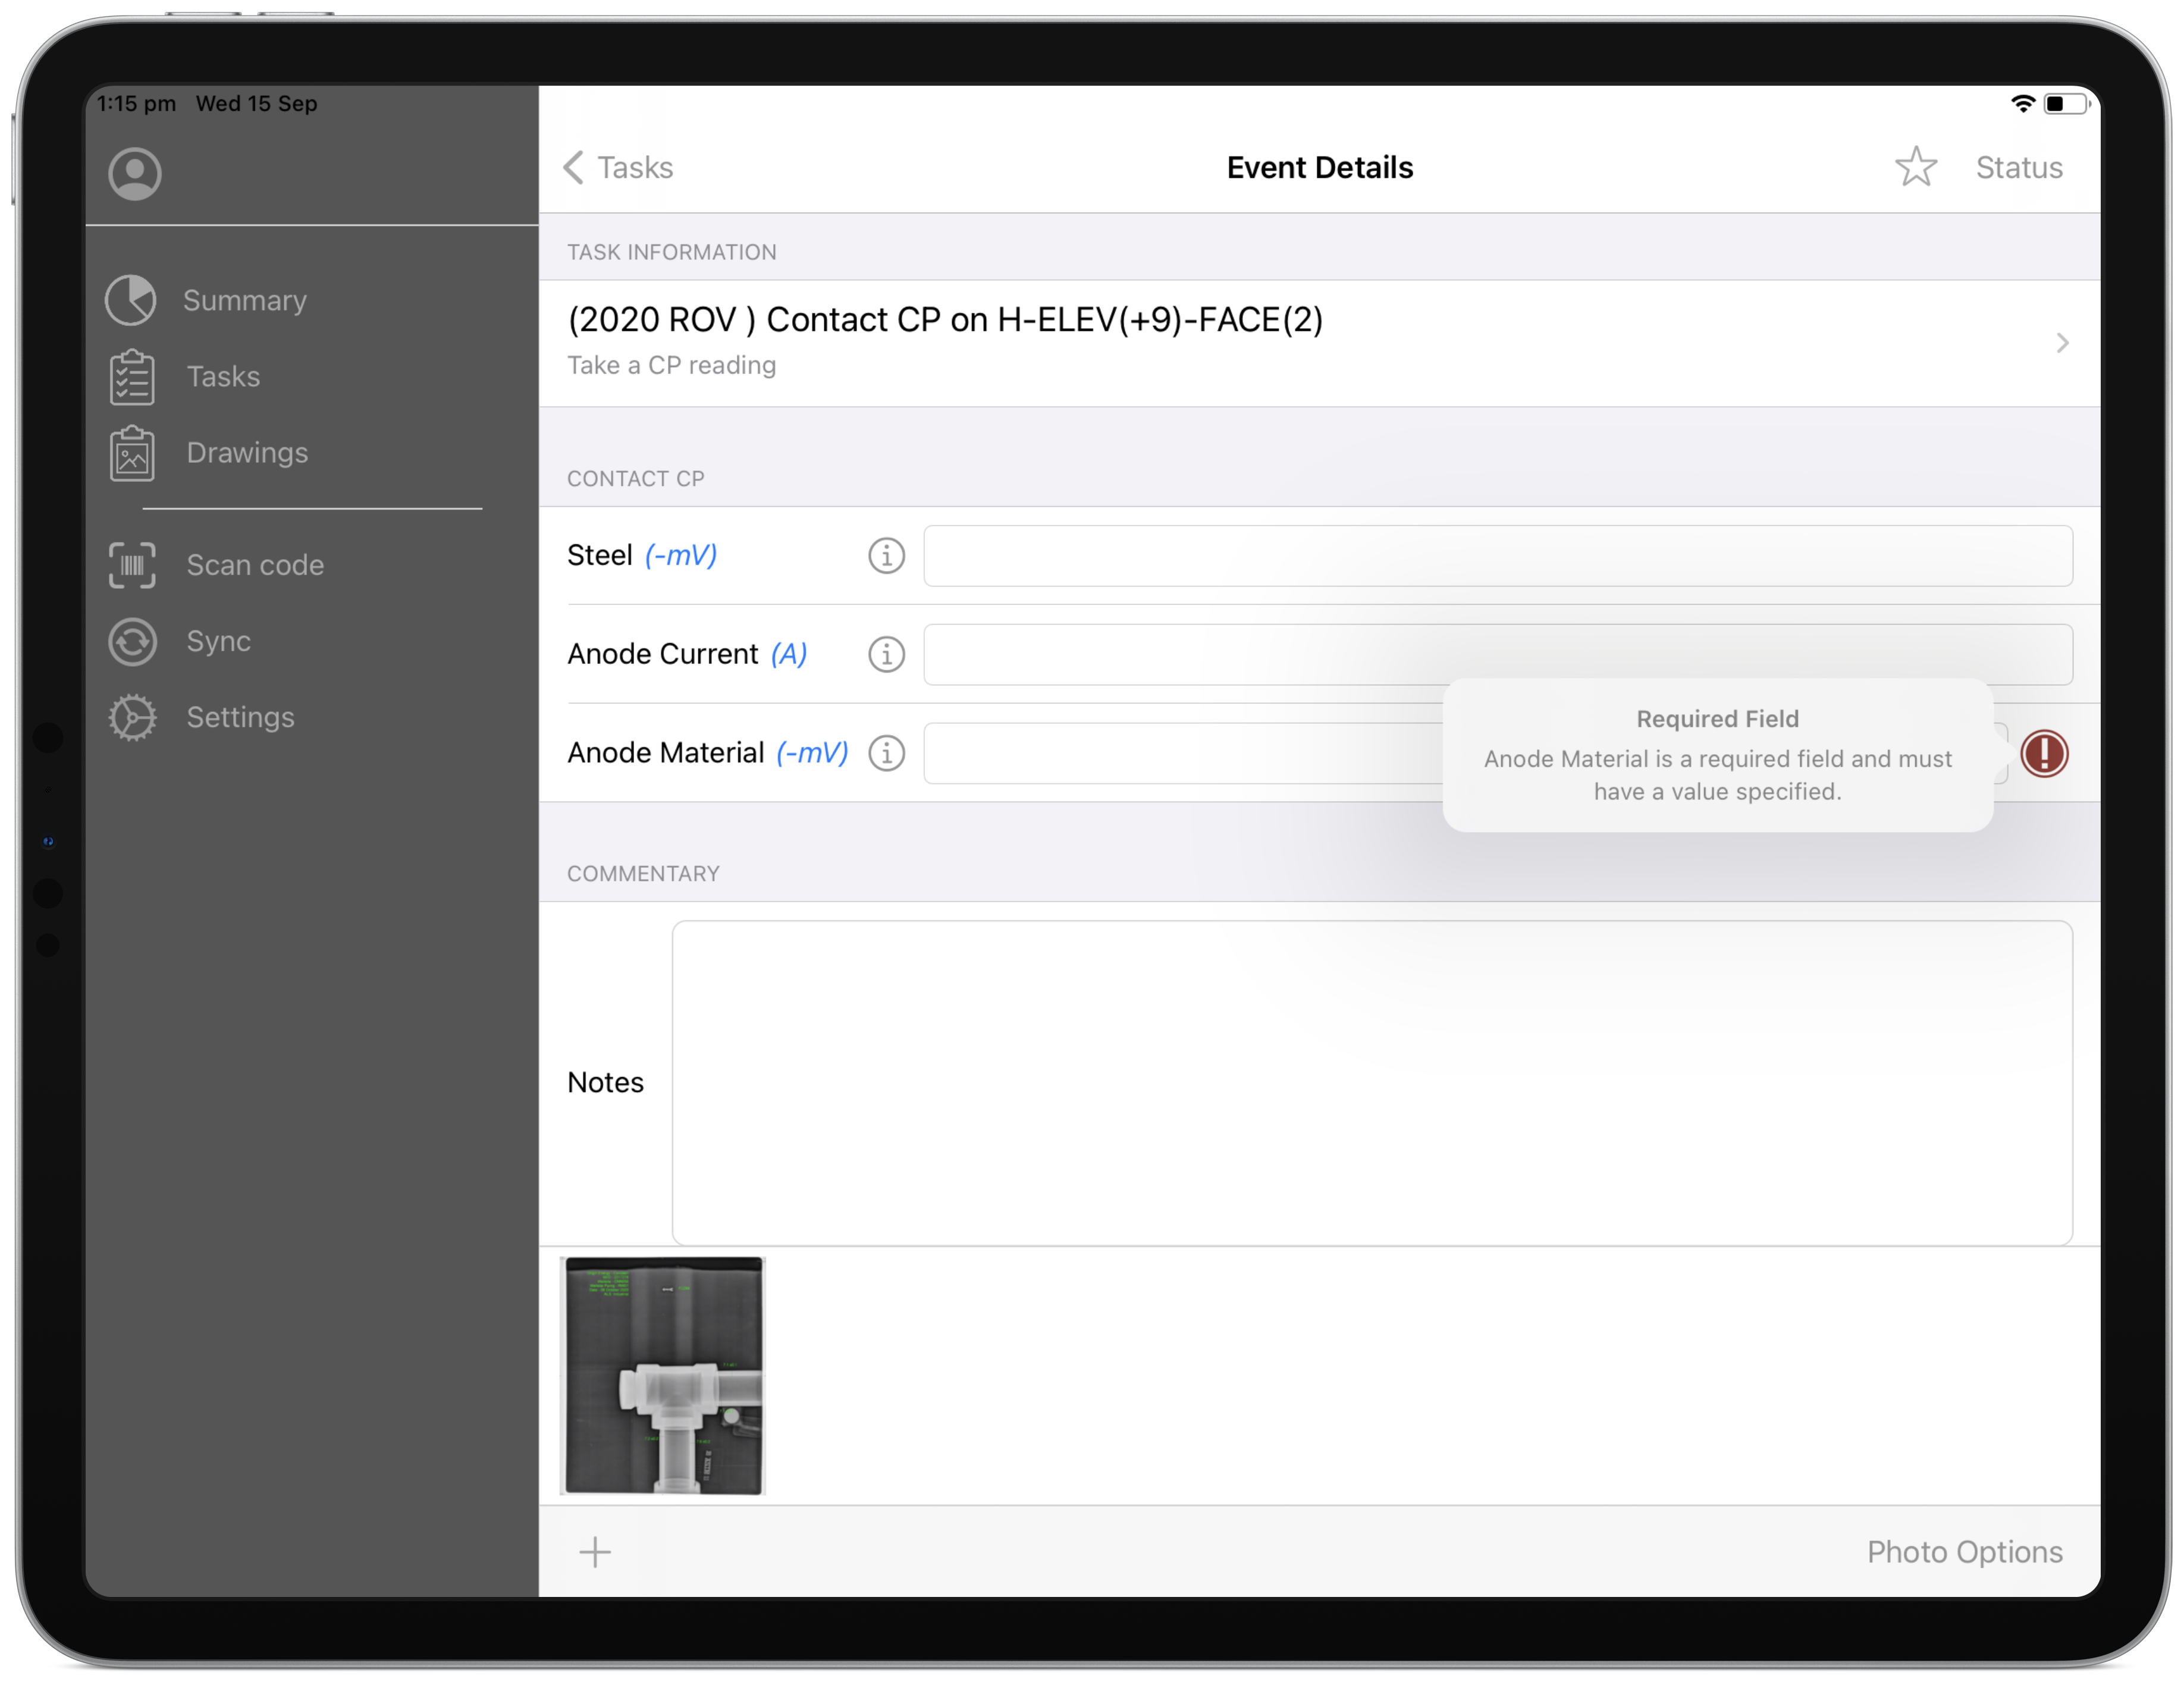
Event Details
For each type of task, there’s a corresponding event form. (These forms can be designed in NEXUS IC.) You can fill details into the form as appropriate. Some fields are required; when empty, these have a red  required mark. You can clear a non-required field by tapping the
  clear icon. If a field has a comment, it is viewable by clicking the
  icon visible next to the field.
Tip
You can change the text size on event forms (and therefore how much of the form fits on your screen at once) in your iPad’s Settings app, under .
Once you have filled in any required fields, you can complete the task by tapping Status then Mark as Complete.
If you are unable to complete an event, you can tap Status then tap an option from the drop-down. The items available in this list depend on what your database has configured in NEXUS IC under Task Status.
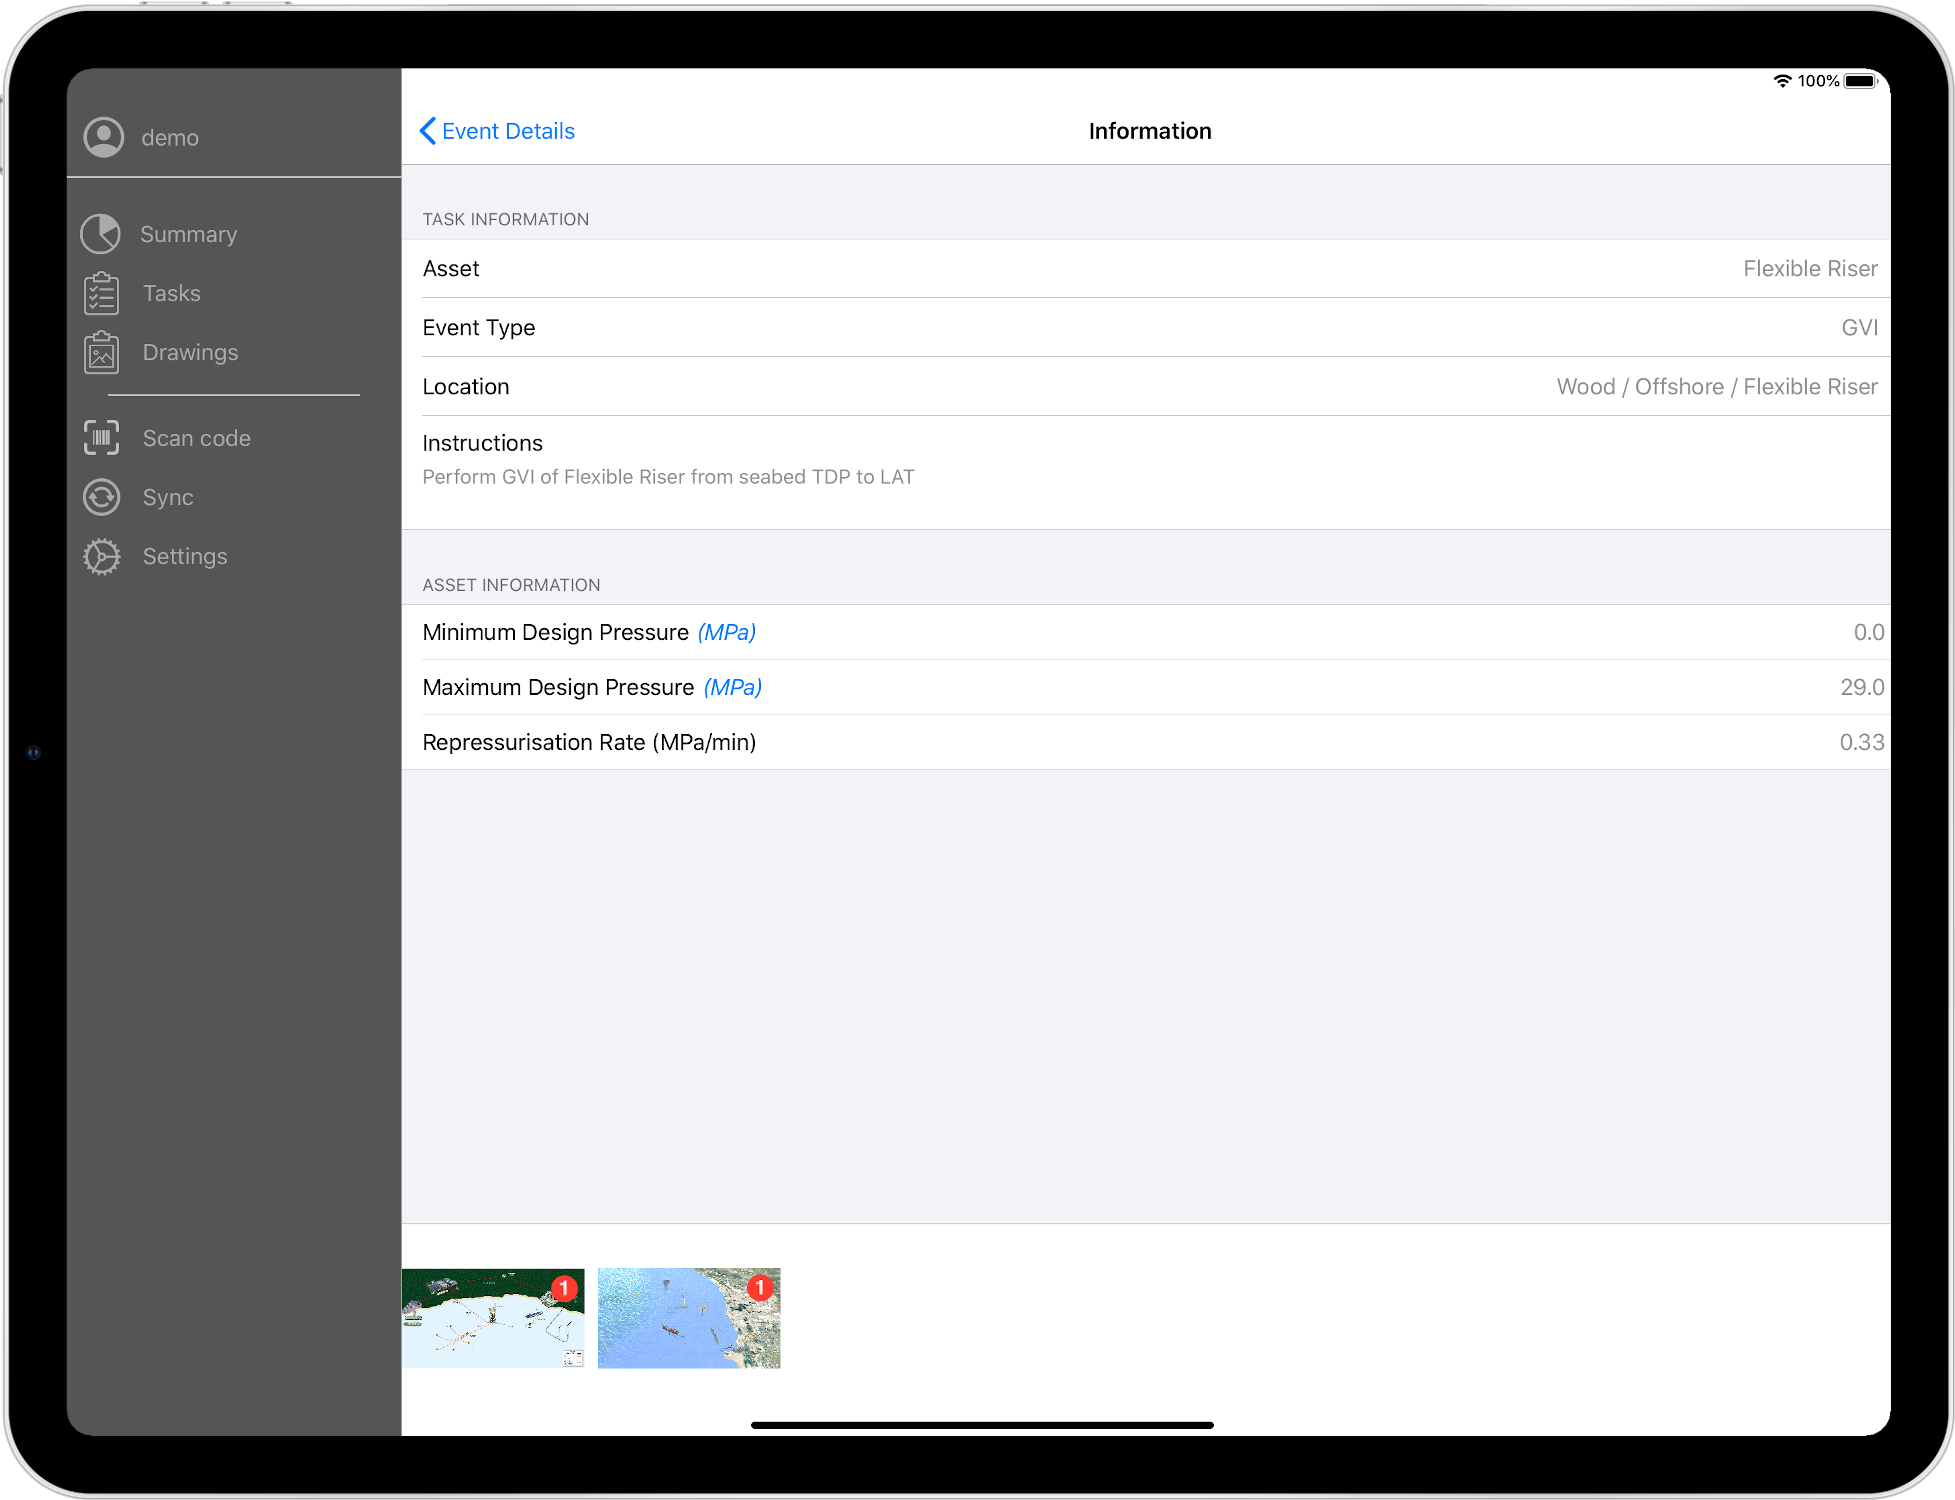
Task Information
Tap on TASK INFORMATION to see details of this task (the asset name, event type, asset location, any task instructions, and any drawings directly linked to this asset). If any Asset Information is configured to be shown in IC-Inspector, it will be shown on this screen.
Photos
You can add photos to your event details. Tap the  button to show a list of photo options. From here you can select Camera, Library, Drawings, or Sketch to import images. Any images you add will be shown in a banner along the bottom of the Event Details screen.
Tap the
 Camera button to take a photo.
Tap the
 Library button to select one or more pictures from your iPad’s photos library.
Tap the
 Drawings button to choose a drawing with layers linked to this task’s asset. If there are none available then this option will be disabled. The available drawings will be shown in a new window for you to select.
Tap the
 Sketch button to bring up a markup canvas. From here you can create a sketch using markup tools to be saved as an image to the Event Details.
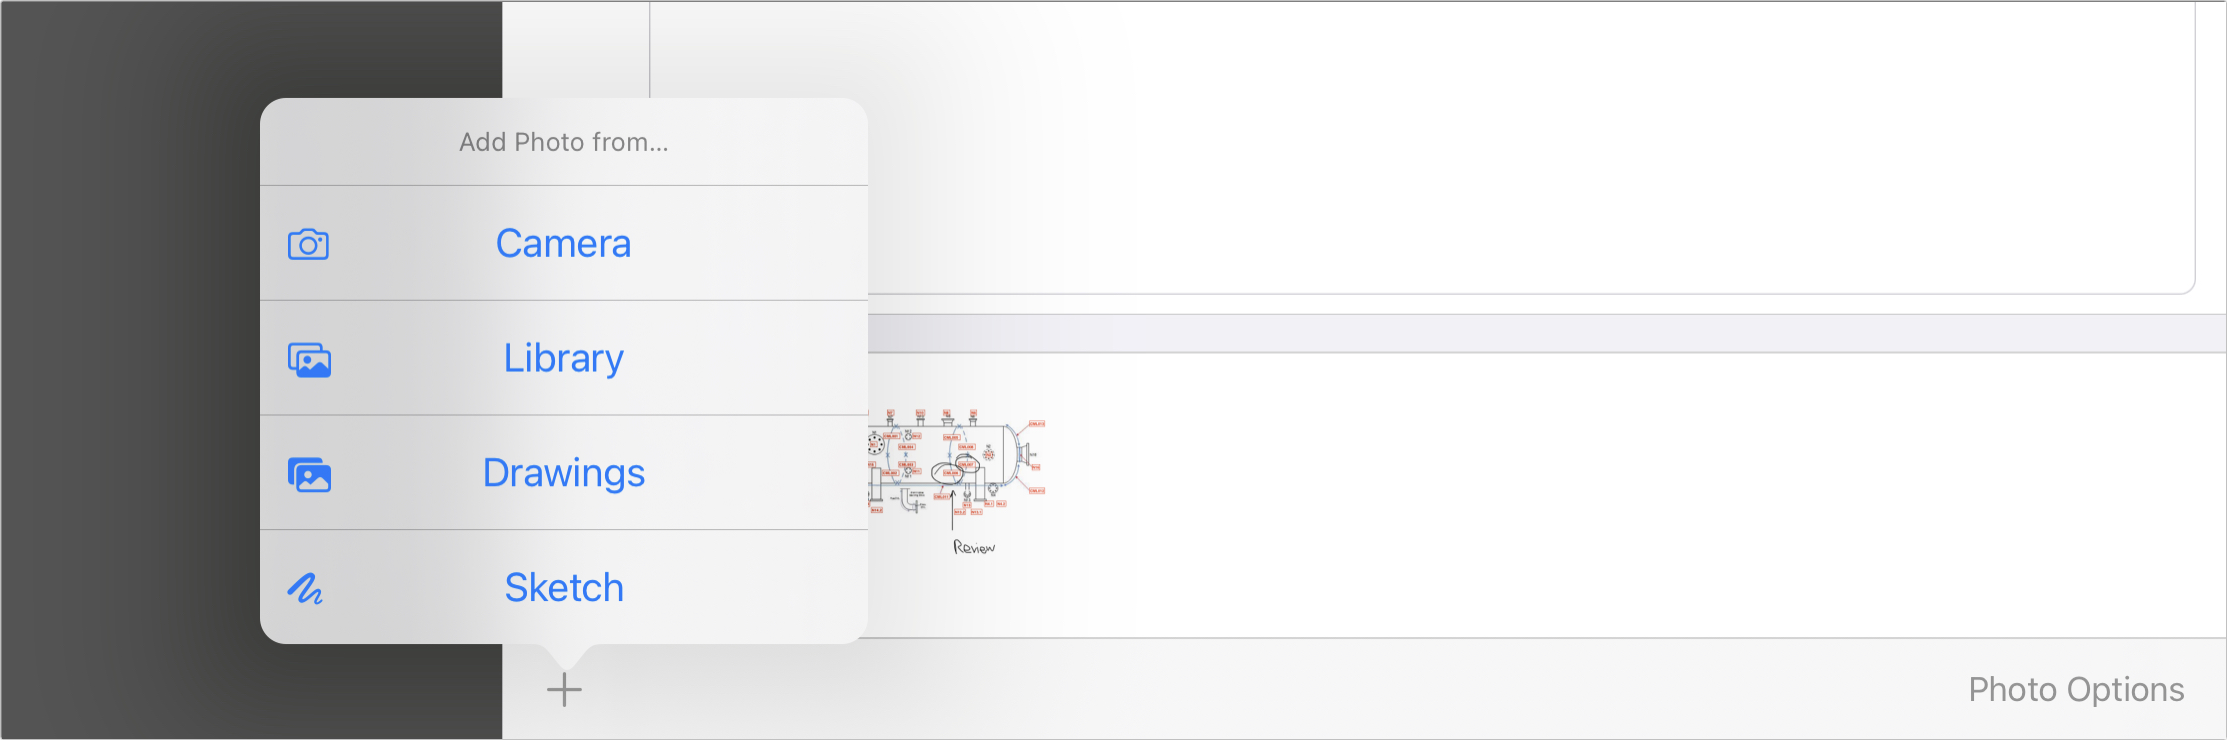
You can markup any image you have added directly in IC-Inspector. To do this, tap the image on the Event Details screen to show the image in full, where you can swipe between images and edit the image in view. On the right of the top menu bar, you can select the  markup button to markup the image.
To remove photos, tap Photo Options (at the bottom right of the Event Details screen) then tap one or more photos to select them. Then tap the  trashcan icon. Similarly to send photos somewhere else (to a message or email, to the Photos app, to a printer, etc.) select then tap the
  share icon.
Bookmarks
You can “bookmark” an event by tapping  . The icon will change to
  . You can tap again to remove the bookmark. Bookmarking is used for user-defined purposes: it can mean whatever your organisation wants it to mean. Its usual use is to flag events which require review: checking grammar, checking that you are on the correct asset, sense-checking data recorded, etc. You may wish to add text in the Notes field flagging the reason you have bookmarked this event. Bookmarked events will be flagged with a green star in NEXUS IC’s Event Listing.