3D Drawing Preparation in Autocad
In order to prepare a 3D drawing follow the steps below:
- Create the required attributes in Autocad
- In Autocad type ATTDEF, the following form will open
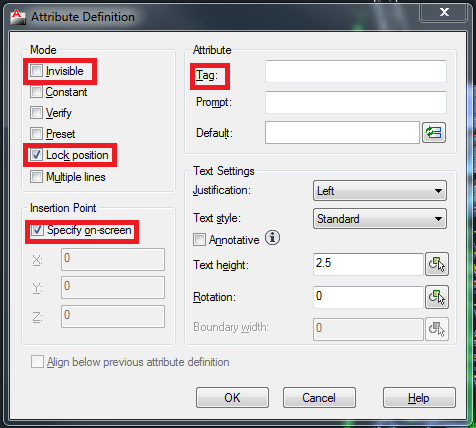
- Check the Invisible mode and uncheck the Lock position mode
- Uncheck the Specify on-screen and leave the coordinates X:0, Y:0, Z:0
- In the Tag textbox, type the name of the attribute (e.g. EXTERNAL.REFERENCE.3D.DRAWING.TAG)
- Press OK button
- Repeat steps a – e for each attribute to be created
- Create blocks with attributes
- In Autocad type BLOCK, the following form will open
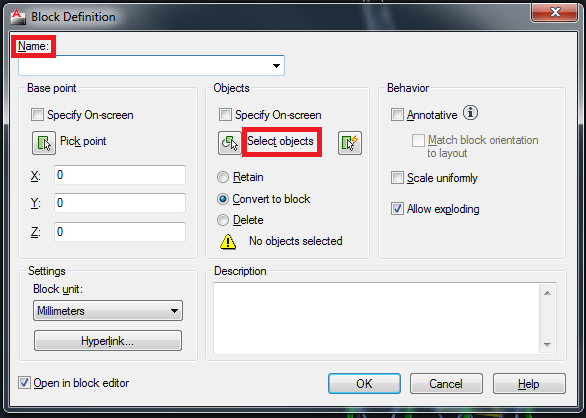
- Type the block name (preferred to be the object component unique ID)
- Click on Select objects
- Select the attributes created in step 1
- Select the object required
- Press OK button
- Fill out the attributes values. The value will be filled with the unique identifier that will be used by NEXUS IC
- Repeat steps 1 – 3 for each object in the Autocad drawing
The above steps could be time consuming, therefore an AUTOLISP (one of the Autocad scripting languages) has been developed to automate the attribute and block creation as well as the attributes value population. You will need to download the AUTOLISP file from here.
This file can be used to automatically do the steps for creating a 3D drawing using Autocad. The steps to use the AUTOLISP are as follow:
- Open the drawing in Autocad
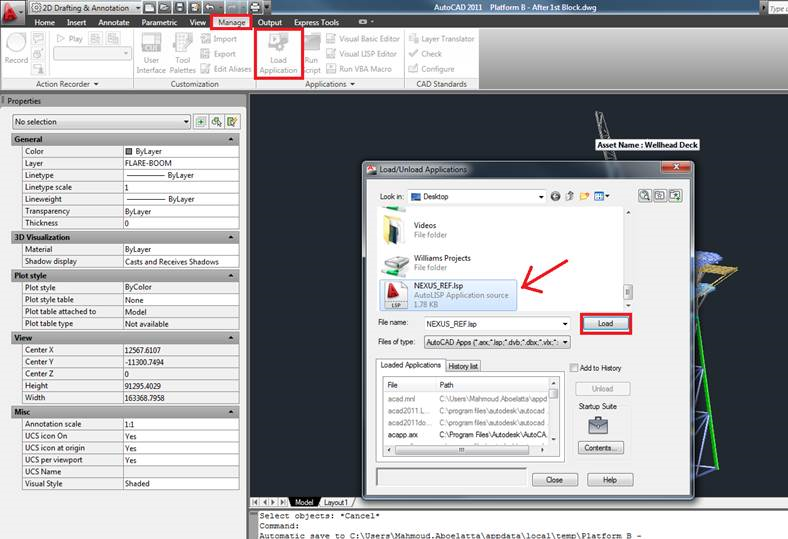
- Go to the Manage tab and click on Load Application
- Select the “NEXUS_REF.lsp” file
- Press the Load button
- Press the Close button
- In the command line type the following command: (NEXUS_REF)
In order to use this AUTOLISP, it is required that each object in the drawing to be on a separate layer. These layers should be named as the external reference name (e.g. Leg_B1). The script will do the following:
- Create attribute with the name “EXTERNAL.REFERENCE.3D.DRAWING.TAG”
- Create a block for one object, setting the block name to be the same as the object’s layer name
- Populate the attribute value with the object’s layer name
- Loop on all the objects and repeat steps 1 - 3
You can download a sample 3D drawing from here.
This sample Autocad drawing can be used in conjunction with the Autoslip file for further clarification.