Import
The Import functionality gives the user the ability to bulk update data stored in the database. There are numerous Import buttons throughout NEXUS IC — the Import button on the Assets screen allows you to import assets and Asset Information; the Import button on the Library screen allows you to import Library Types; the Import button on the Library tab within the Library screen allows you to import Library items; etc.
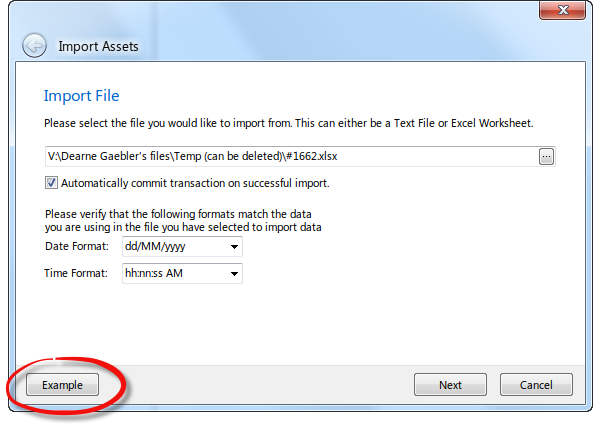
The format of the Excel workbook needs to be very specific. It is recommended that you use the Example button (shown below) to generate an Excel template in a format suitable for importing data.

The Import Template generated from the Example button will highlight fields which have been flagged as Required fields, set up lookup lists and provide information on the format and field type in the grey rows as shown here:

Caution
It is important to note that as the Importer is importing rows, the SQL server creates Row and Table Locks. This may mean that to other users accessing NEXUS IC, the application may appear unresponsive. When the import has finished and the data committed, then the Row and Table locks are released and the other users will be able to continue using NEXUS IC as normal.
The Import Wizard
Tip
If the importer encounters a completely blank row in an Excel file, it will stop importing at that point, even if there are non-blank rows further down. This can provide an easy way to test an import sheet: set it up, and then after just one or two rows of data, insert a blank. Run the import to see if it’s doing what you expect, and if so, delete the blank and run again. Similarly, if the importer encounters a blank column in an Excel file, columns to the right of this will not be imported.
Tip
You can have one ‘Asset Location.Full Location’ column, with levels in the asset hierarchy separated by space slash space, like ‘My Field / My Platform / My Member’, or many ‘Asset Location.Full Location’ columns, with one asset hierarchy level in each. (But you can’t mix the two, with one containing ‘My Field / My Platform’ and a second containing ‘My Member’.)
Sub-rows
Sometimes a single “master” row will have several “detail” rows. For example, an asset information row might have several sub-AIG rows; or an event might have several findings or several multimedia images or both. When this occurs, you should repeat the row, with different “detail” values in each.
For example, if you have several multimedia images to import against a single event, your Excel sheet should have several rows that are identical except for the Multimedia.Name and Multimedia.Image columns. If you have specified an event number, and you use the same event number on each row, NEXUS will only create the event once, but will create several multimedia items. (If you do not specify an event number, NEXUS will instead create several different events with one multimedia item each.)
It is also acceptable to leave event fields blank for all except the last row — under the hood, NEXUS is importing each Excel row into the event, and only the last Excel row imported will “stick”. Note that if your event has a finding, you should not repeat the finding data on each event row — if you do, NEXUS will create one finding for each Excel row that has finding data filled in.
In some cases you do want multiple findings on one event, and in that case you should fill in several rows as appropriate. Similarly for sub-event data or sub-AIG data: if you want several different sub-events or sub-AIG rows imported, you should repeat the event row or AIG row with different sub-event or sub-AIG data in each case. If you are repeating an Excel row for another reason and you do not want several sub-event or sub-AIG rows imported, you should fill in sub-event or sub-AIG data in only one of the Excel rows.
Excel
During an import, we communicate with Excel “behind the scenes”: we command Excel to open the file you want to import, and ask Excel what’s in each cell. An upshot of this is that if you use Excel to modify the file while we’re importing it, even if you don’t hit Save, you may confuse the import process. Similarly if you take a variety of other actions: using Save As, closing Excel, etc. If you see error text “Call was rejected by callee”, this is what’s happened: Excel has stopped answering our calls.
Note
It is possible to create new Asset Hierarchies by importing Assets with hierarchy structures that don’t already exist. In doing so, new Parent Assets will be created. In case this is not the desired result, the Test Import will throw a warning, for example:
Line x: Parent Asset “Example Parent” will be created for the location “Wood / Example Parent / 00C-2401A”
“xx new Parent Asset(s) will be added.”