Anomaly Actions
An anomaly may have one or more anomaly actions associated with it. Anomaly actions can be assigned to individuals or teams or departments and may have a “due by” date.
Anomaly actions are not necessarily inspection type actions (eg. Confirm WT reading). The Anomaly actions functionality can be used as a reminder to initiate a study with a vendor, or to have a discussion with an OIE about access.
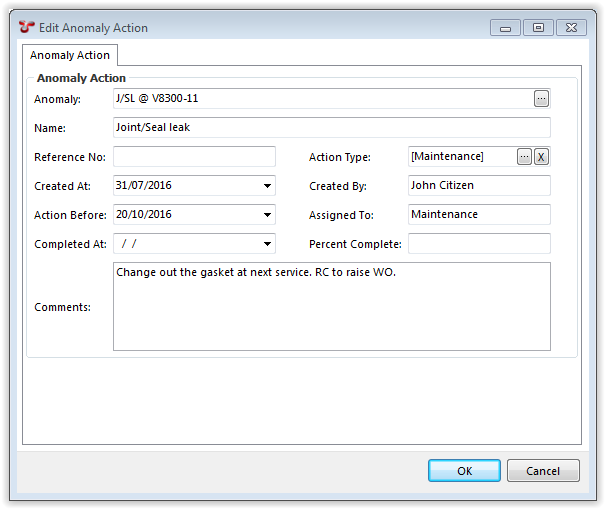
Properties of an Anomaly Action
- Anomaly - Is the name of the anomaly that this action belongs to. To change the anomaly that the action is assigned to, click on the
 button to the right.
 - Name - A short (50 character limit) name for the anomaly action.
- Reference No. - Used to reference (or cross reference) number. The number may relate to a Work Order number in your Planned Maintenance System.
- Action Type - Choose from a list of pre-defined action types. Typical action types may include “[EVENT] - UT Reading”, “[ENGINEERING ASSESSMENT]”, or “[TEMPORARY REPAIR]”, however this list is user-definable and action types can be added or edited by clicking on the ellipses button on the right hand side of the action type input control.
- Created At - Enter the date that the anomaly action is created. This will default to todays date, but is editable thereafter.
- Created By - Enter the name of the person creating the anomaly action. This will default to the currently logged in user, but is editable thereafter.
- Action Before - Enter a date that the anomaly action should be completed by.
- Assigned To - Enter the name of an individual or department that is responsible for progressing or completing the Anomaly Action.
- Completed At - Enter the date that the anomaly action was completed. Please note that an anomaly action is not deemed “completed” until there is a valid date entered in this field.
- Percent Complete - Enter a value between 0 and 100. This is for reporting and information purposes only.
- Comments - A large free text field to retain additional information about the Anomaly Action which may not already be captured in the properties of the anomaly action.
- Is Tasked? - This field is indicative of whether this action has been assigned with a task or not.
Report Table Sources
To extract anomaly action data into a report template, use the System Table titled Action as the primary Table Source. For more information see Report Templates.
The Grid
The Actions grid lists all anomaly actions for the currently selected anomaly (or anomalies).
The Actions Toolbar
- Launches the Add Action dialog. Properties of the new Anomaly Action are to be completed and saved by clicking on OK, or click on Cancel.
- Launches the Edit Action dialog and allows you to make changes to the currently selected Anomaly Action. Click on OK to save changes or Cancel to ignore changes and close the dialog.
- Deletes the currently selected Anomaly Action.
Tip
To bulk update (or delete) Anomaly Actions, use the Multi-Edit functionality available from the Actions grid.
- See Import for full description of the Import menu item.
- See Export for full description of the Export menu item.
- See Customise for full description of the Customise menu item.
- See Connections for information about the Connections toolbar option.
- You can assign one or more tasks to an action of an anomaly. By clicking on this button the Select Task dialog will be displayed, you can select the task from the existing tasks or you can add a new task. The action must have Action Type to be able to assign tasks.