Tools
Options
All options and settings in this dialog are currently user specific. The options and settings are stored in the windows folder: C:\Users\[USER_NAME]\AppData\Roaming\NEXUS
- Launches the Options dialog with the following tabbed pages:
General
- Prompt to backup database on startup - When checked, the ‘Database Backup’ wizard will be launched on login.
- Network path for backup/restore - This path must be accessible to both the database server and to Integrity Centre. This may be a UNC path (like ‘\\MyServer\MyShare’) or if the database server and Integrity Centre are running on the same machine it may be a Windows path (like ‘C:\Database Backups’).
When the path is valid (i.e. it is visible to both Integrity Centre and the database server) it will have no border. If the path is invalid, a yellow border will be shown around the field.
Tip
The database server process must have permission to read and write to the folder. If the path is shown as invalid, check the permissions of the user account that the database server service is running under.
- Cache Folder - Drawings, Library Items and Multimedia images, when retrieved from the database for the first time are saved to this folder.
- Export Folder - This is the default path that NEXUS will use when exporting data.
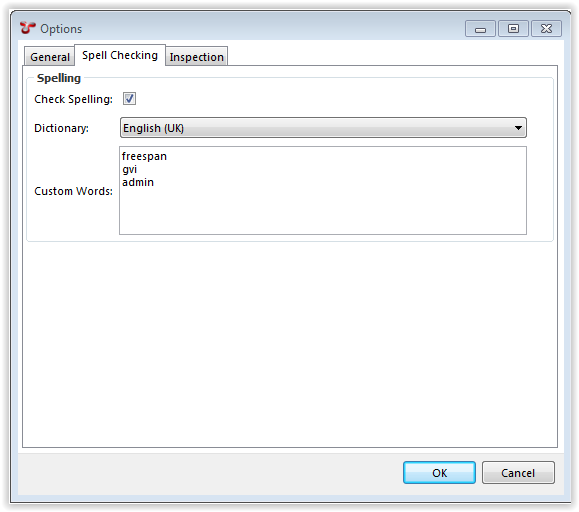
Spell Checking
- Spelling - When checked, typed data is spelled checked against the selected Dictionary.
- Custom Words - Enter words that should be ignored by the spell checker. Enter one word per line.

Inspection
- Inspection Shortcuts - Inspection shortcuts allow the user to assign Function keys and Numeric Keypad keys to common review actions within the Inspections Review screen. Click on the Restore Defaults button to pre-populate common Shortcut Keys. To assign a shortcut key to an Action:
Video...
The Configuration - Video dialog lists all parsed video files which exist in the folders defined in the Database | Properties | Global Video Path field and the Database | Properties | Temporary Inspection Video Path folders.
- Play launches and attempts to play the selected video file.
- Open Location opens a Windows Explorer at the folder location of the currently selected video file. Note that this menu item is only enabled for non-cloud based storage locations.
- Upload is used to copy video files from the Temporary Inspection Video Path to the Global Video Path. This is typically used to copy inspection video returned from an inspection campaign to the master video storage location. The Upload process gives the user the option to Delete, Rename, or Retain the local video files (this could be on a USB HDD) after the Upload has finished. Additionally, the user can elect to encode the video files to the native streamable H.264 file format during the copy process.
Parse Video...
Clicking on the Parse Video... menu item, initiates a process whereby all files in the Global Video Path (and the Temporary Inspection Video Path if one exists) are read and the properties stored in the database. The datetime properties of the video files are the links to the events in the INSPECTION screen.
The parsed videos will appear in the Tools | Video... dialog (see above).
 Ellipsis button.